Jeremevans
-
Posts
582 -
Joined
-
Last visited
-
Days Won
2
Content Type
Profiles
Forums
Events
Store
Everything posted by Jeremevans
-

Hatfield Marine Science Center meeting July 2017
Jeremevans replied to badxgillen's topic in Meetings and Events
I love the science center. Sounds like it will be a great meeting. Sent from my SM-G920V using Tapatalk- 19 replies
-
- 1
-

-
- hatfield marine science center
- hmsc
- (and 3 more)
-
Getting scuba certified next month!
Jeremevans replied to Higher Thinking's topic in General Discussion
I wouldn't worry too much about the swimming. The trip sounds great. I did my certification about 10 years ago in Cozumel and had some fantastic dives. I learned while at 100 feet not to approach turtles that are as big as me. The instructor started clapping and going nuts under water. The ride back in the boat was a lecture about turtles and the risk of getting your airline cut by their jaw at that depth. I would say learn your equipment and safety procedures well. I've gone on to do spearfishing and cold water drives in heavy tides and I'm glad my instructors were so thorough. Sent from my SM-G920V using Tapatalk -
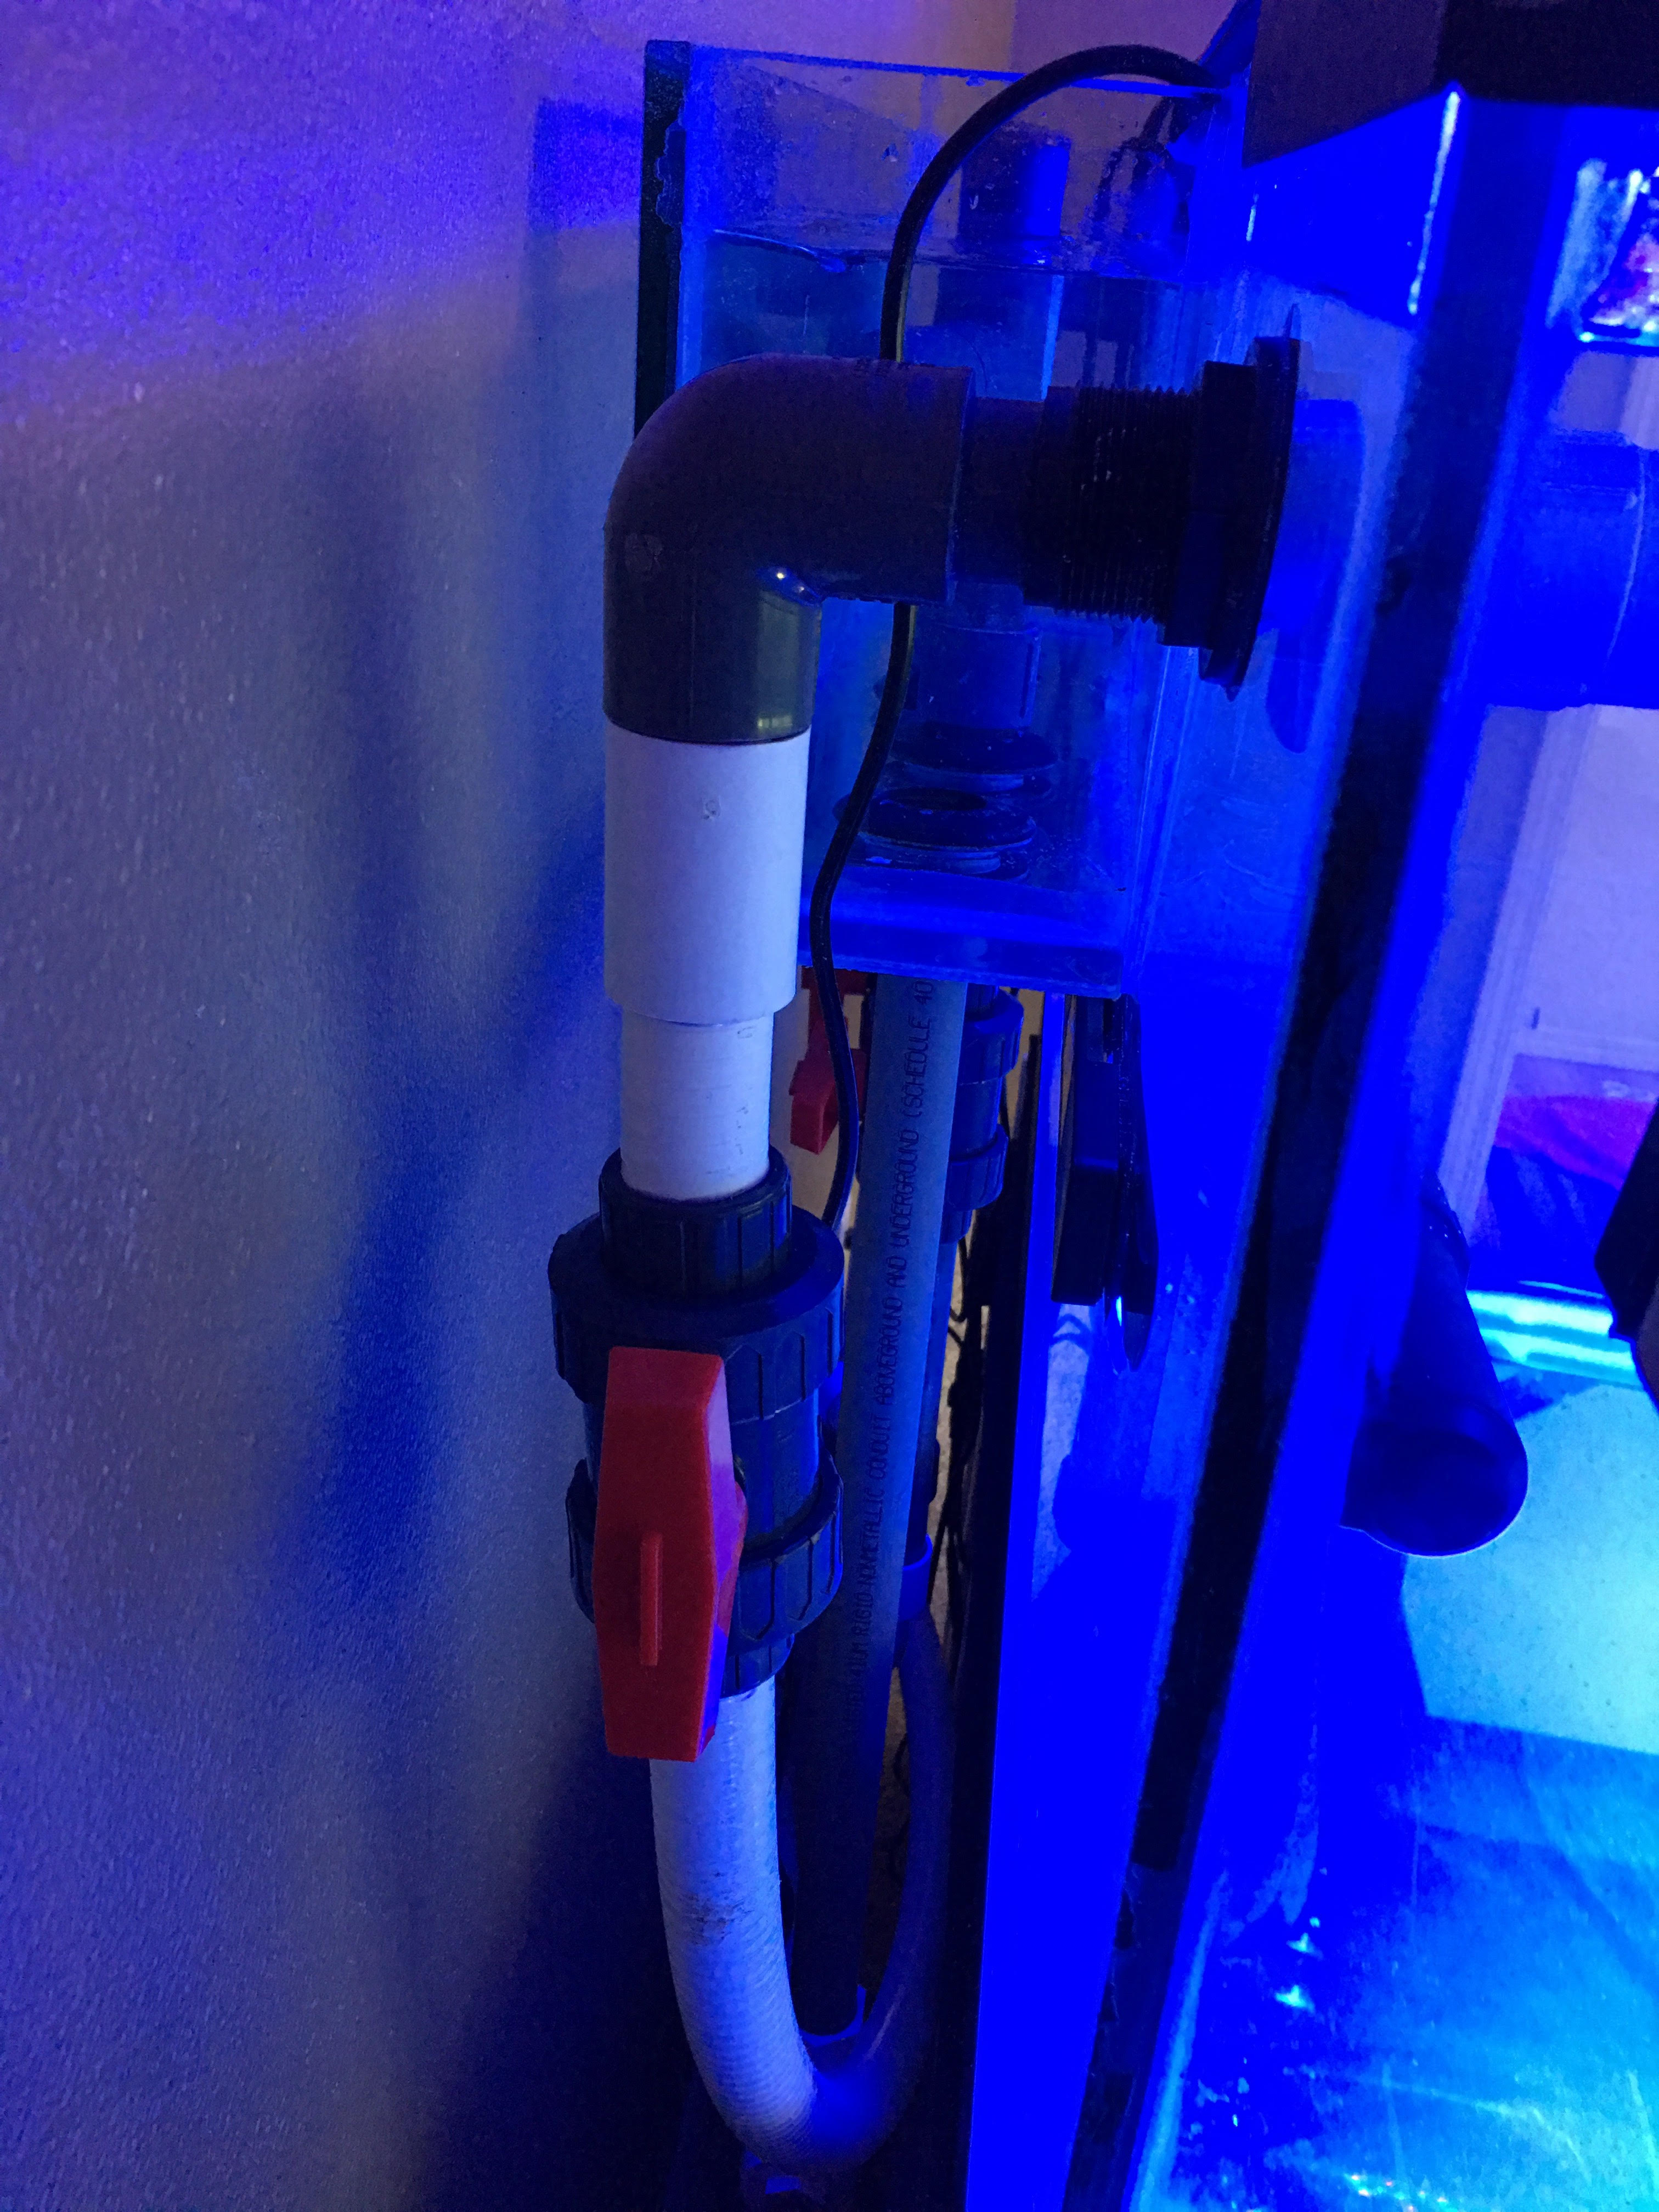
I'm a little behind on updates (and they were already not real time / lagged). So now I have to figure out where I am actually at versus where this thread is at... We left off with water going in and lots of details left. I started by adding salt and then adding media. I used a marine pure block--and yes I have seen the BRS write up eluding to aluminum leaching. I have had great results with their products and I'm going to go ahead and use the block and some balls (to transfer bacteria). Maybe I'll test aluminum at some point. I can say that I rinsed thoroughly with RO water and I plan to avoid touching / breaking / crumbling my media.I also went ahead and moved some of the balls over while you were reading this. So, the bio balls were used to transfer bacteria--which is what I have used in the past for QT tank seeding as well. I also went ahead and added some dry rubble. That leads me to the topic of rock. I had some dry rock (used) sitting around and someone (Son) on the forum was getting rid of some rock so I picked that up. I then decided to play with some Muriatic acid. I had seen the method mentioned, and I will admit I thought carefully about the risks before trying this out. When I first mentioned this to Lindsay she was a little terrified. She is so dedicated (antsy) to getting the tank up and running that she even went to the store and bought the muriatic acid! Before I tried using the acid I gathered a plastic bin, an old power head, rubber gloves, goggles, and some clothes with good coverage that I wouldn't mind ruining. When I started adding the acid the rock fizzled and foamed. It is pretty incredible to watch how powerful this acid really is. I let the bin sit with the acid and rock overnight (probably around 15 hours total). The next morning I added baking soda to the water to neutralize the acid and then drained the bin on my side yard gravel. Then I rinsed and rinsed and rinsed everything. I forgot to mention that after I initially mixed up the acid I promptly started the power head and then stripped down and took a shower, just to be extra cautious. The rock came out squeaky clean and some old epoxy even fell off. I'm quite happy with the results and would definitely to this again (if ever needed). It was not as scary in the end as I feared, but I would still take caution when playing with acid. The next step was aqua-scaping. This means endless google images and forum searched mixed with turning rocks on the garage floor and staring for hours on end. I filled the in between time with thinking up a way to mount the rocks to something that would balance them and allow them not to scratch the tank bottoms. I really wanted to minimize the risk of breaking a glass bare bottom tank. In the end I used some large diameter plastic pipe, a drill and some zip ties to mount the rocks. The look isn't wonderful, but not terrible either. In time coralline algae will cover them and before that corals will probably block the view anyway. I did epoxy some rocks together, but only small pieces to larger pieces. I had not worked with epoxy before, but it turns out it does not stick to rock naturally, so some rubbing and encouragement is necessary. By now you have figured out the rocks are in the tank (probably skipped to the pictures anyway by now -- I would have). The rest of my attention has been focused on building out the sump closet and getting the skimmer operating. The pictures can mostly speak to this, but I might add that there is a reinforced shelf in the closet which will house a trash can for RO water storage and the skimmer. I also had a small drip at the return connections to the tank. You might remember the headache re-using the fitting here had given me previously. There is a picture of the latest version which is now much improved (not leaking). Since I am rolling together a few weeks of progress here I'll also add that there is one lonely blue damsel living in the tank. I'm calling him 'Little King' for now since he has the whole kingdom to himself. He's doing well and ammonia, nitrite and nitrate are all reading zero. Tune in next week when we add 17 yellow tangs and see what happen. I'm kidding but there are some fish (tangs included) that are waiting for their new home. We have a purple, kole, and hippo all living away from each other right now. They are destined for this tank and will probably be fine together. There is an desire (wife) to add a yellow tank, but I'm not sure I want to take my chances yet. I'm open to advice or thoughts on that.


-
Nice shop! I had never been in before and picked up a couple of nice items including a green bubble coral. I'm also pretty excited to get going with the doser I won!

-
I saw the acid trip last week and it's stellar. His whole tank looks great. Sent from my SM-G920V using Tapatalk
-
Thank for all the thoughts. I'm looking at halichoeres wrasses now and I'm learning there are so many more types of wrasses than I realized. Sent from my SM-G920V using Tapatalk
-
I'm excited for this frag and to help out the Tanks for Teachers. I found out recently that my autistic nephew gets to see one of these tanks at his school. Sent from my SM-G920V using Tapatalk
-
How large of a container? Sent from my SM-G920V using Tapatalk
-
So is like to get a wrasse for a couple of reasons. They are interesting to look at and watch first of all. Second, they seem to have the potential to eat some weekends and bugs which could be helpful. The problem is I'm seeing up a bare bottom tank and I think most Wrasses sleep in the sand? The second issue is that I think they can be a bit fiesty and perhaps not always reef safe. I've heard competing advice about six line Wrasses. Some say strongly yes and others say no. Would you put a Wrasse in my tank? There's lots of Sps... And no sand. If yes which type? Sent from my SM-G920V using Tapatalk
-
$55 Sent from my SM-G920V using Tapatalk
-
It is time for another update. Over the last week I pieced together the plumbing remaining plumbing on the tank and did some work on mounting lights. The plumbing was done a little at a time over almost every day in the last week. If I could have carved out some solid time (and had a fully baked plan) I would have taken Andrew up on the offer to help...I now understand that I could have used some help. It didn't go all that clunky, but I did make more runs to the hardware store than I had envisioned. At first I didn't have all the parts I needed, then I needed just one part but I bought the wrong one and so on and on it goes. I would still not call the plumbing done, but the big stuff is out of the way. The pump pump and return line are connected and leak free (now) and there are 3 drains which are in place and working decently. The return line from the pump gave me a little trouble. It turns out that I either did not glue one elbow or barely glued it. When I did a first water test through the line there was a small but noticeable puddle of water under the pipe. When I pulled / twisted just slightly on the pipe it popped apart. It was purple inside so at least I meant to glue it even if that didn't happen. I'm still not sure what happened but it is fixed now. The second leak was an almost undetectable drop coming from the tee above the pump. This was irritating as I glued one of the unions too close to the tee to simply cut and replace it. So... I did something that is definitely not by the book here. I cut the pipe right below the leak and then used my Dremel to bore out the pipe from the fitting. That is hard to do nicely and takes a long, long time if you are being careful. Also, my dremel is battery powered so I needed a charge in the middle. I did get it bored out and then glued the pipe (generously) back into the fitting (with an extension below). You will see (in a future picture, maybe) that my return line is not level due to this. It will probably get level in the future after I plumb more tees into that line for the refugium, reactors and skimmer. So now that those links are gone I tried to run the system again and learned that the flex PVC inside which was going onto a nipple fitting had a very slight leak on both sides. I contemplated adding clamps, but I was truly amazed at the leak since I had to use very hot water to even allow me to get the flex PVC onto those nipples int he first place. So, now what to do? The other end of the flex pvc was glues in place, and I did not put a union in these lines--as I figured I could cut them if needed. I did contemplate cutting them. Well I snuck up to the bathroom and snagged my wife's hair dryer and started coaxing the PVC to back off the fitting (or at least loosen up). Eventually I was able to pull them off. I then decided to roll the dice and glue them in place. If this doesn't work long term then I am buying new bulkheads and coming up with a new plan. Once they were apart I had to dry them out with this handy blow dryer and then prime them. Then I heated the flex pvc with the hair dryer for a second time, quickly applied glue and then slipped it all back together. Oh, and then I repeated the process because I was smart enough to make two connections like this . I did catch a break when I tested the other 3 lines and I found there were no leaks. These runs are simpler and there is no flex pvc. I also had true union valves in place so it figures that the easy to disassemble lines would not have a problem. I then turned on the flow... Oh wait it took 2 days to pull enough RO water to fill the tank and sump and then I turned on the flow (last night). I was a little amazed to watch how much water was moving. I did the math earlier, but seeing it makes it more impressive. I also learned that I made the right move having 3 x 1" return lines. The first one runs at full siphon and the second one catches the balance. The third one isn't necessary, but I sure like having an emergency overflow available so that I can sleep sound at night. When I initial thought about the runs I was going to send 2 x 1" returns back to the garage, but when you are under the house already what's 1 more pipe? Okay--So the water movement is looking good. Now my wife says are you sure the tank is level? I did freeze for a second and then I ran to garage to get a level. Crisis averted. I was careful through the build to make sure every piece was square and level and now it turns out that luckily my house is too. This was a moment of truth and the level showed the tank in both directions was arguable perfectly level. Now, I stopped to have some fun. Those Gyre's arrived and I wanted to make some waves in the tank and see what they could do. I'm still not sure where I will finally place them or what mode to use, but right now they are following the Lunar Tide Cycle as I write this. These are impressive and I'm pretty excited to have them. They also look clean and are pretty darn quite for the flow they produce. I kept putting my hand in front of them just because it is so much flow even compare to the return pump. Last, but not least I started prototyping the mounts for the lights. We debated hanging from the ceiling, but my wife liked the legs that the T247s come with and their overall look. So, I headed to the store and started looking for ideas. I ended up with an aluminum railing that is sort of a C shape. I cut this down and drilled some holes which line up with the hanging mounts on the T247s. Then I bolted 2 of the lights together using two of these rails. I could then use the legs on one side of each light to support he units. So far I'm thinking this could work. Initially I did not have washers and the railing was not snug enough with the lights to give them enough rigidity (and they sagged slightly in the middle -- there is one picture with the sag and one without). I should mention here that we looked at Holly's build thread for some inspiration as Lindsay remembered liking the look of that setup. She has a great build thread if you haven't seen it, by the way. Well, that about wraps up another week. Oh wait, we also picked up a purple tang, foxface rabbitfish, a tailspot blenny, and two anemomes which are hanging out in the QT for a while. And, I plugged in the heater and the tank is now warming up. In the next week I need to finish some minor fine detail work on the stand railing around the bottom of the tank, tune the overflow, add salt and then start cycling. I'm going to be moving some marine pure media over from the current tank and adding some new media as well and I expect good and speedy results. I also need to work on the remaining framing of the insulated sump closet and filling the gaps in the floors so that Lindsay doesn't have to be scared of spiders from below coming to get her.


-
Share the Love: Jack-o-Lantern Leptoseris
Jeremevans replied to milesmiles902's topic in Share the Love
Awesome! I'm excited for this and to share the love in future. -
Awesome picture. What is that called? Sent from my SM-G920V using Tapatalk
-
Definitely plenty of work left on plumbing and building the sump area in the garage. I think the heavy lifting is over, so most of the help I'll need is cheering frags on to grow into nice colonies. That's the fun part. Sent from my SM-G920V using Tapatalk
-
Another weekend has passed and the tank is progressing. This weekend I finished most of the fine work on the stand and then we moved the tank into the house. The move worked out more smoothly than I expected. My wife was so excited to get the tank moved that she called up my brother in-laws and her father to come out. With 4 men moving the tank, and 3 women directing all went smoothly. The first step in the move was to build some ramps. We were so carried away in moving the tank that not many pictures were taken, but there is one of the ramp I build for the first step. To get into the house we had to go up two concrete steps up and then another step as you come into the door of the house. Once inside its a quick left through an extra wide opening. The tricky part is that the tank has to enter the house on its side because the front door is only about 34" wide. So we bought two moving dolly's from Harbor Freight rated for 1000 lbs each and planned to tip the tank on the side and then roll it into the house. With 4 people this maneuver went smoothly and the ramps made the work easy. I forgot to mention that the stand had to move first and took a similar path, but that was easy and light in comparison. Once the tank was into the room and next to the stand it was time to lift. Before we did this we realized smashing a finger could be a real problem. Luckily my father in-law had a quick solution to place two 2x6s on top of the stand (cut down to just over 4 feet long). The tank would be lifted up and turned then set on the boards which were on the stand. Then we could lift one side at a time and remove the board. This avoided a smashed finger because we did not have to support the full weight of the tank and could re-position people easily. The tank went into place easily and seems to be enjoying the new home. I should also add my wife did a nice job jumping in to clean the bottom before the tank went up into place. You might notice that the foam under the tank is covered in black cloth. This was done because we expect to have a bare bottom tank with some gnarly flow. Oh, yeah, I also ordered those two xf250 Maxpsect Gyres this week. Under the cloth is some simple foam to help ensure the tank is level on the stand. After the tank went into place I decided to start assembling the mesh top so that we can keep the fish in the tank. I did not put the finished picture up because I'm already going to modify it a bit to accommodate the work that is going to show up in the next post. What you should know is that the BRS kits rock! They give you lots of extra netting so that when you do something silly like drop something on the net and tear a whole you can just make another one. So, what else happened. I decided I'm going to move away from water changes someday or at least perform fewer than I do today (10% week today). So, I ordered a bunch of kits and have been studying up on the GlennFs Dutch Synthetic Reef method (http://dsrreefing.com/). I'm not looking to run this exact method, but something like it. I also ordered those Gyres, a bunch of valves, flex PVC (to make connections to the pipes behind the tank easier), and I caved in to an urge and bought the Flipper Max scraper (it's a beast!). I also picked up some hardware railing to start setting up my lights. I'll have more on that in the next post--I'm going to have 4 OR T2457b's and a 4x t5 fixture. Oh, and last of all there is a purple tang and foxface rabbit heading to the quarantine tank this weekend. Since I use MarinePure media and have previously cured rock I'm hoping that this tank can be cycled rapidly and ready for fish in the next month. There is a real possibility that water will be in the tank in the next week or two.


-
PM sent. I'm interested in the purple tang and fox face. Jeremy Sent from my iPhone using Tapatalk
-
Share the love #2 Sent from my iPhone using Tapatalk
-
Share the Love: Jack-o-Lantern Leptoseris
Jeremevans replied to milesmiles902's topic in Share the Love
Share the love! What a great concept. Sent from my iPhone using Tapatalk -
OFFICIAL: sps grow out thread
Jeremevans replied to The ReefBox's topic in Grow Outs, Group Buys, and Competitions
There is a little growth at the base on the plug. It has a touch more color but nothing significant. Sent from my iPhone using Tapatalk -
I've seen lots of color running nutrients too low with GFO and carbon. It took place over a week or two and then I dialed back the carbon and shut off the GFO for a while. About two weeks later colors were back. I chalked it up to a sudden drop in Phosphate to 0 from about 0.1. I can't be sure of the cause though. All that said there was no overnight bleaching and I didn't lose any corals. Are you sure they are bleached (no hope left?) Sent from my SM-G920V using Tapatalk
-
OFFICIAL: sps grow out thread
Jeremevans replied to The ReefBox's topic in Grow Outs, Group Buys, and Competitions
When is the end date? Sent from my SM-G920V using Tapatalk -
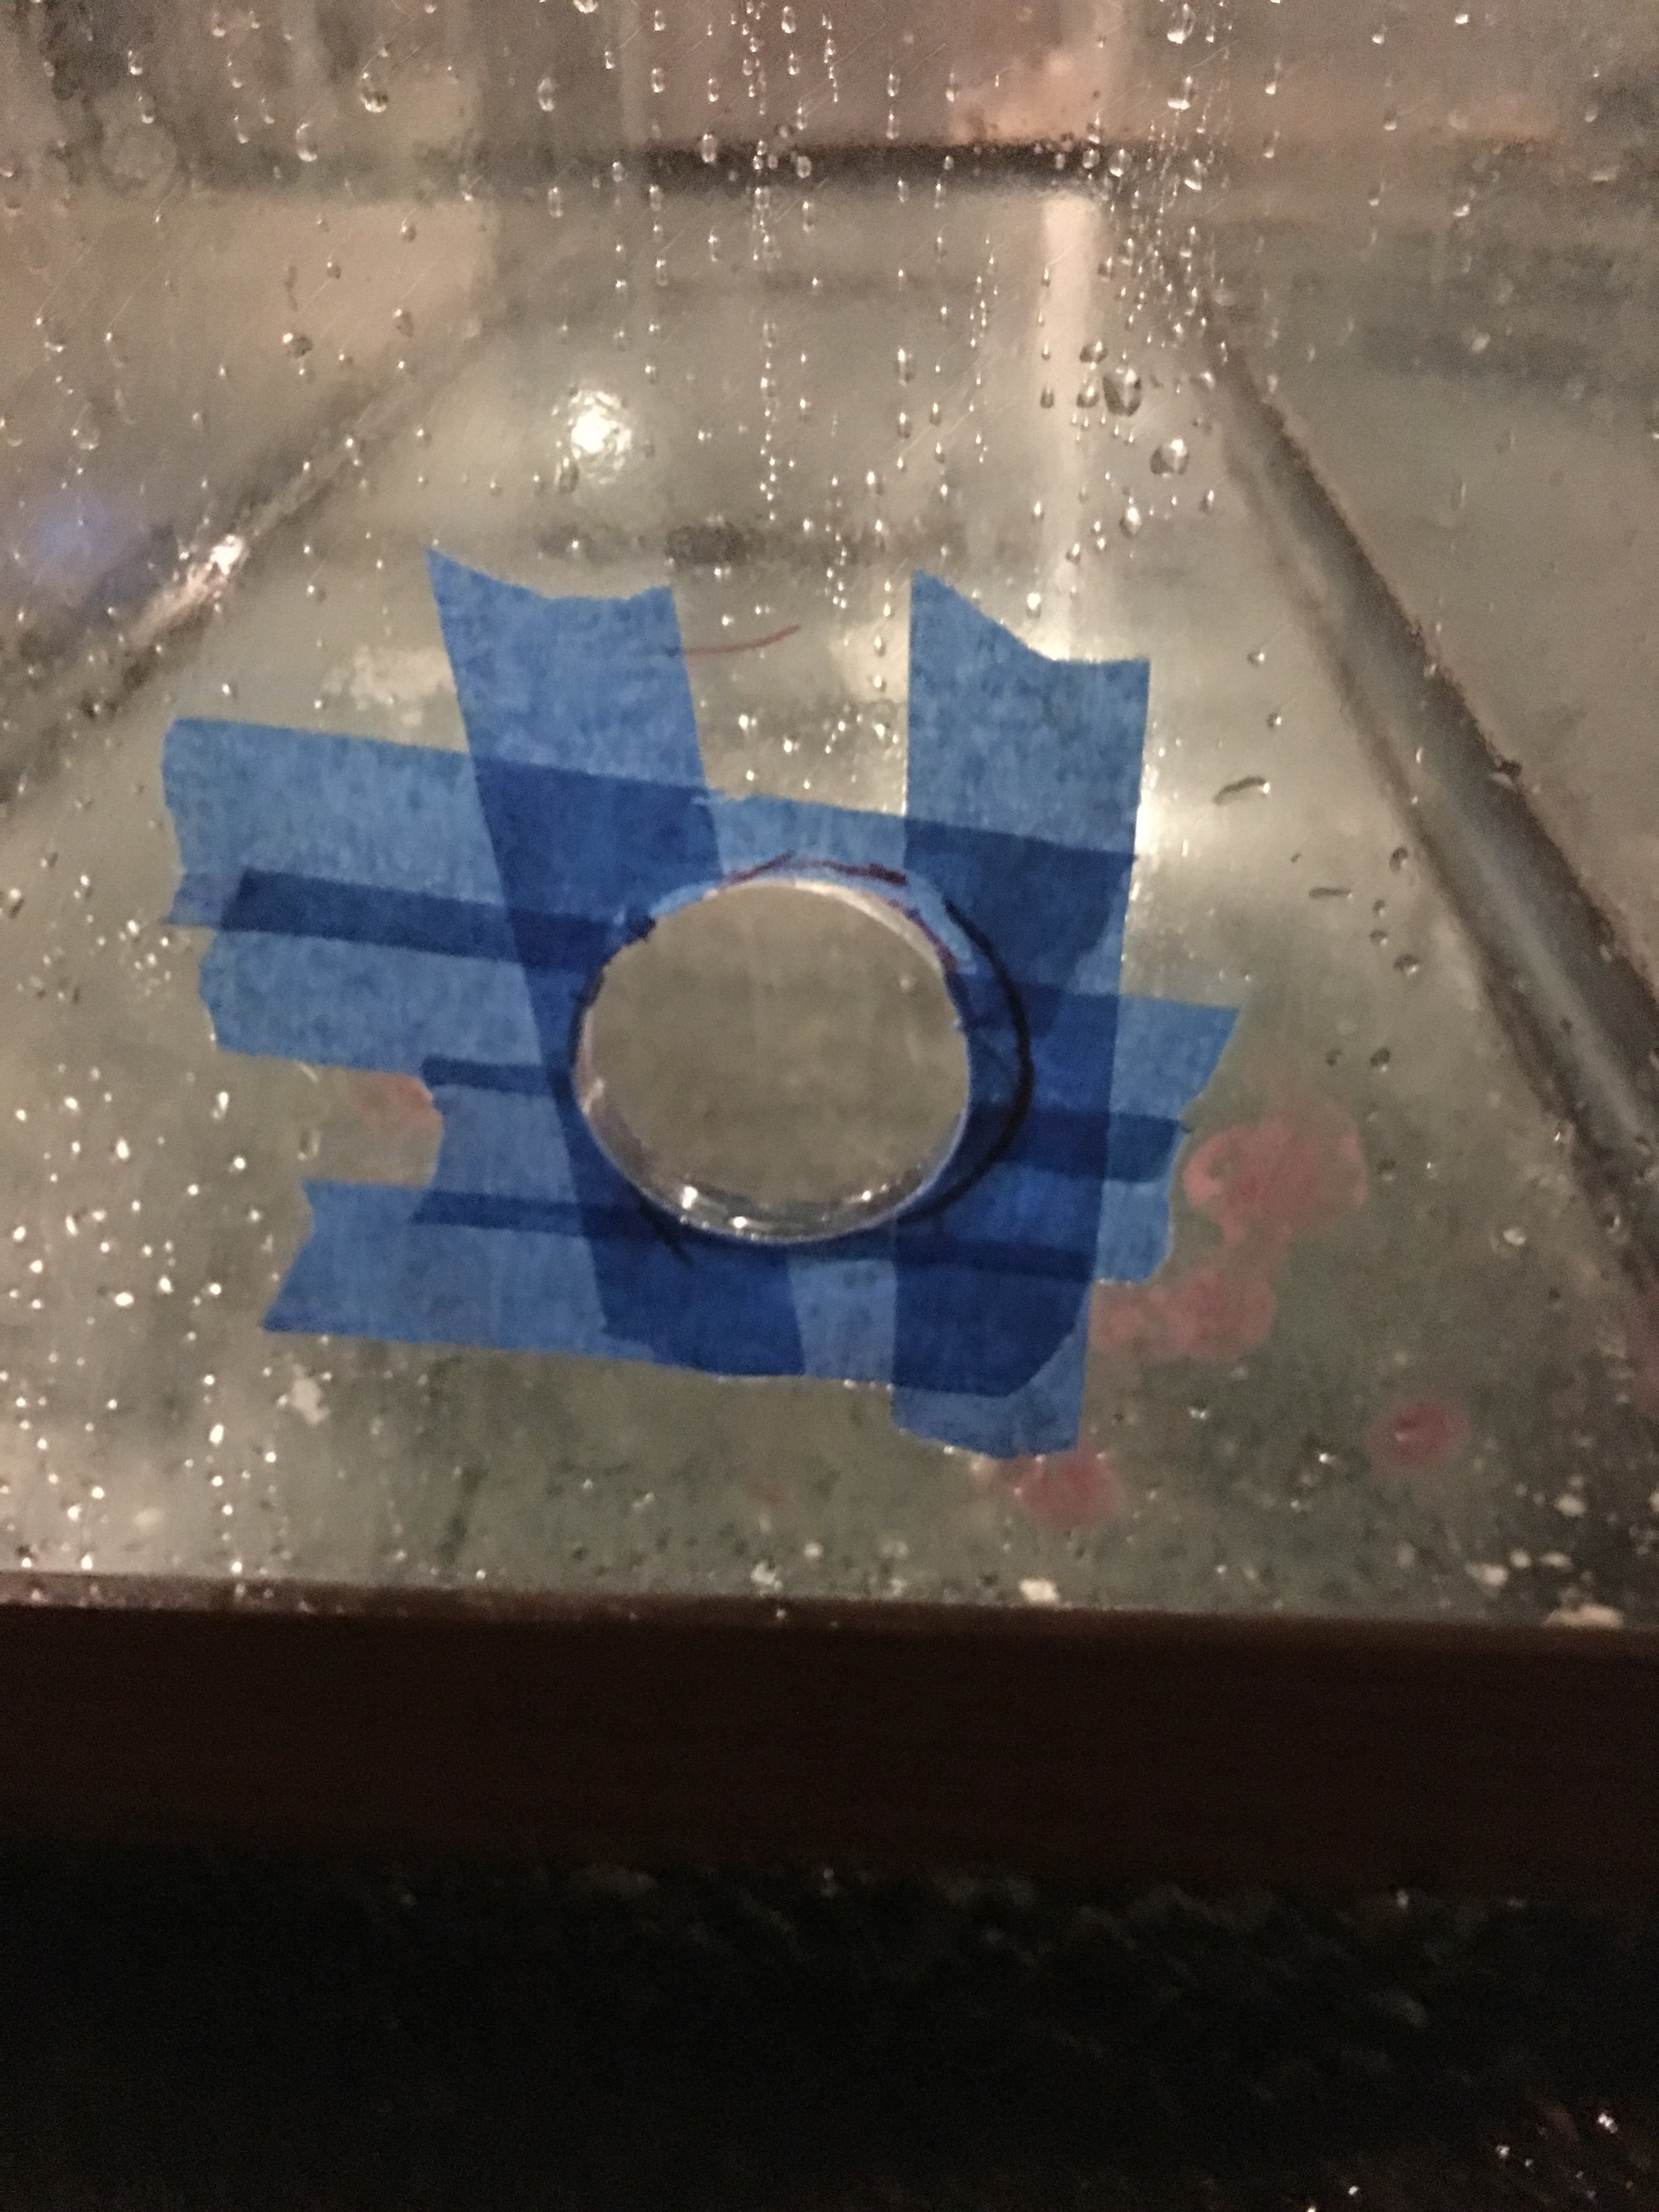
Two weekends have passed since the last updated, but progress has not stopped. I did not take as many pictures this time around, but there are a few included. In this episode we reinforce the floor, plumb 4 x 1" PVC lines under the house, paint the stand and start to apply the finish paneling to the stand. Then we will drill a hole in the sump and drain the test water out of the tank since we now feel confident that there are no leaks or integrity issues. I decided that reinforcing the floor would be the prudent thing to do, so what was my first step? Go to the store and buy materials. In retrospect, I should have climbed under the house and taken a look first. It turns out the proposed placement of the tank was in a perfect location--that is the floor was already well supported. The wall this tank would be near is clearly load bearing for this two-story home. In addition it appear there is a large beam which sits under the open floor area near the hallway / opening to this room (this room is a sort of den / family room with nearly an entire wall open above this beam. Since I was already dressed for the job and under the house I decided to install the additional support anyway rather than returning it. So, I went ahead and placed it a bit further back (behind the black duct you can see). This should still provide some additional load bearing capability to the floor, but was probably unnecessary. And now a picture of the beam installed. The posts have a hold in the center where a bolt runs through and allowed me to easily snug the beam up to the house. If you look close you can also see the a pipe coming through the floor where I decided to plump the tank. The pipe is placed to allow some flexibility in placement of the tank, but runs right against a wall in the house (I pulled up the carpet from under the trim and drilled a hole). After this picture was taken 4 pipes were run through the floor and off to the right toward the garage. Now, let's take a look from the garage. You can see the 4 pipes coming through the wall here. Since the garage sits lower than the house these pipes are against the insulation under the house and yet come out on top of the concrete in the garage. That last picture also has a sneak peak of the sump which is now drilled with a 1" bulkhead. Before and after pictures are below on the drilling. Now let's look at the stand. These pictures are pretty louse since I had already cleanup up the garage and pushes this project into the corner. I decided to place a permanent outer layer on the stand. I did not mess with doors for now since I have a young child and I don't need to house anything under here. Maybe in the future I could cut out a patch and place a door on the stand, but no need for now. The paneling on the outside is a bead board and the trim was re-purposed. The stand will end up being painted gloss white. When I bought the panel I though it would fit in the car, but it did not so on the roof it went. I held it on with twine and drove slowly along a mile of side streets with one arm out the window. Over this weekend I expect to finish up the fine work and painting of that stand. Then I will finalize placement in the house. I also have the kit in hand to build out the screen top for the tank (from BRS). The lights have arrived now that OR T247s became available again. I'm going to use 4 of them to light the tank and then probably squeeze in 4 t5's if I can manage it. I still need to dream up a design for something floating above the tank to house the lights. I'll also be buying insulating panels this week to build a box around the sump in the garage to contain moisture and moderate any temperature swings. I've also picked up a marine pure block. I still need to make up my mind on flow production. I'm pretty close to clicking the button on two Gyre 250s. Meanwhile... my frag rack is overstuffed with coral and my wife keeps asking when the new tank will be ready.


-
How is the sound/noise level at 70% ?
-
How's the coral now? Any luck getting rid of the pests? Sent from my SM-G920V using Tapatalk
-
Sent a PM and a text message. Sent from my SM-G920V using Tapatalk