

HexaReef
-
Posts
143 -
Joined
-
Last visited
-
Days Won
1
Content Type
Profiles
Forums
Events
Store
Posts posted by HexaReef
-
-
Found it! FedEx overnight.
-
I'm in the process of ordering some frag packs from WWC. I checked their terms and conditions, but couldn't find anything about shipping. Do they ship USPS Next day? or? I need to know so I can schedule around work to pick up the corals from the post office. I know many of you have ordered from there.
thanks
-
Before and after

Sent from my SM-A205U using Tapatalk-
 3
3
-
-
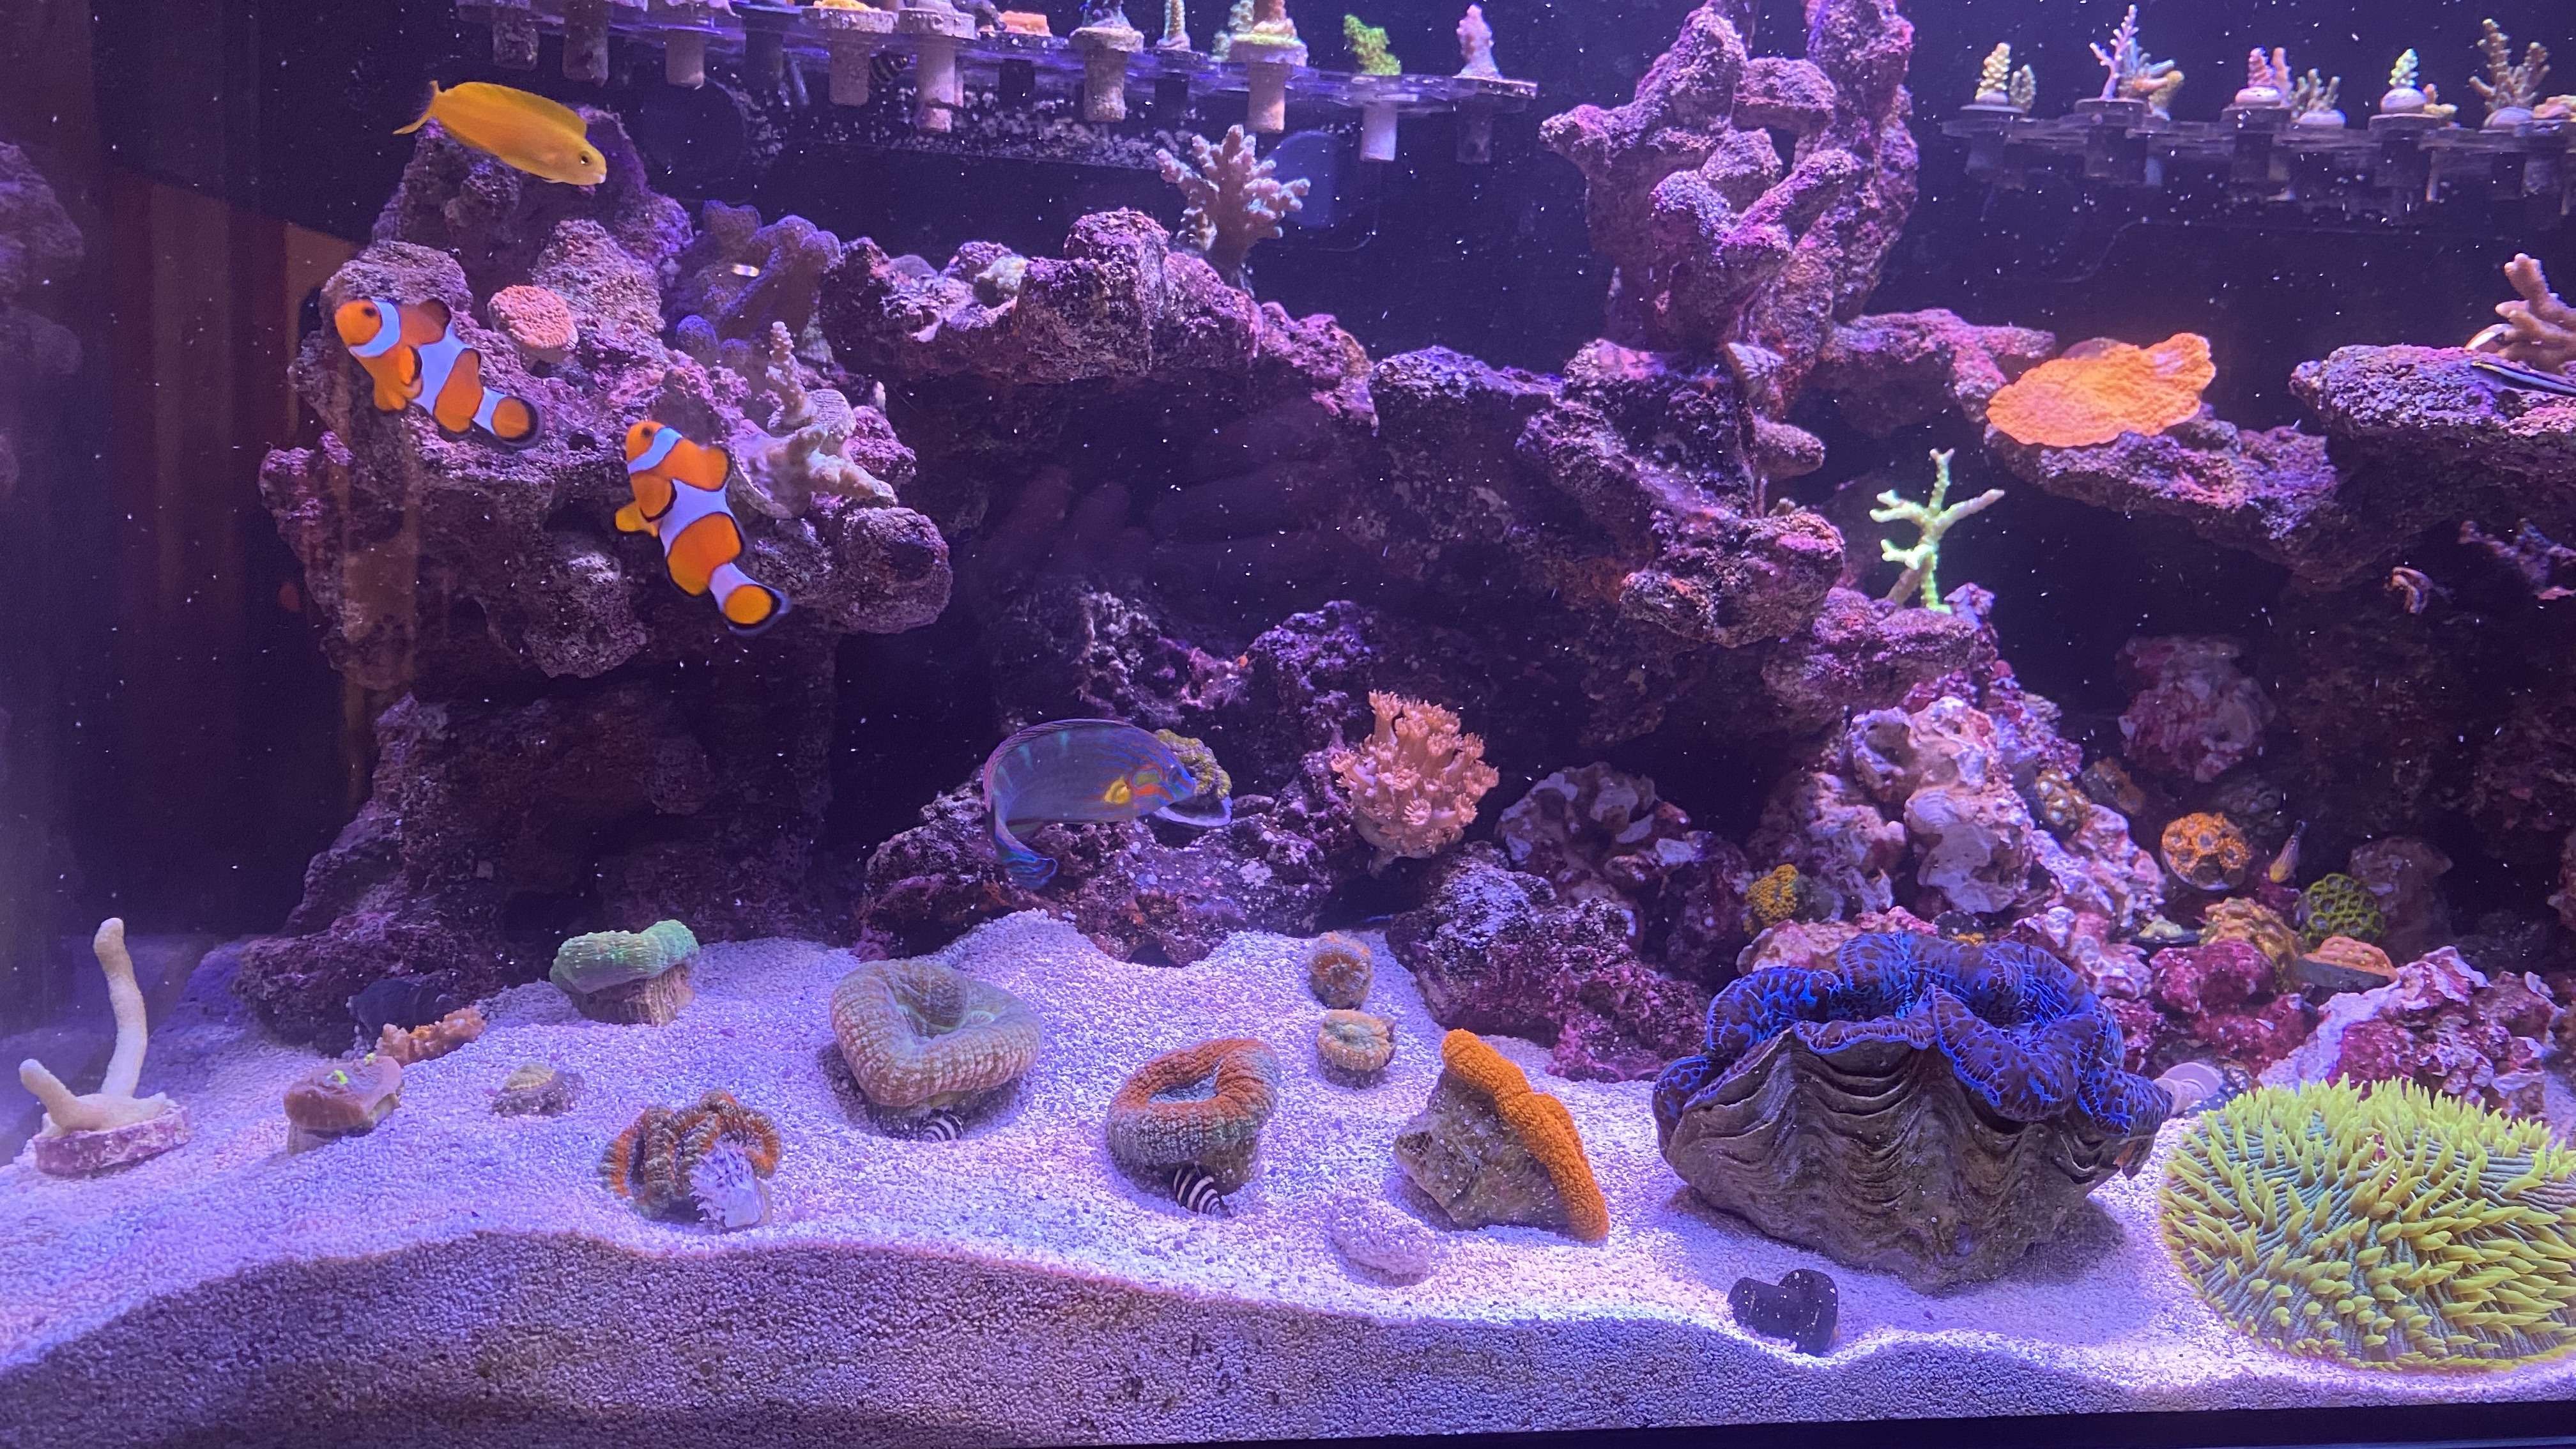
New lights all dialed in! These are the 5 channel Corona RapidLED's. They look amazing, and I can tell the corals think the same!
I have the blues peaked at 90%. Whites are peaked at 70%


Sent from my SM-A205U using Tapatalk -
PM offers if interested.
Sent from my SM-A205U using Tapatalk -
Bubblegum Digi - 2.5" $20
Blue German - 4" $20
Green Birdsnest - 2.5" $10
Unknown Green Acro x2 - 1" $10
Red/Green Favia (candy apple?) - $40(obo)
GSP - 1 plug $free
Open to Offers
In Napavine/Chehalis area


Sent from my SM-A205U using Tapatalk
-
Got my Corona RapidLEDs in today. Working great, and love the customizability. These make my colors pop way more. Need to move them center a bit more. Those eye hooks are from my old lights.


Sent from my SM-A205U using Tapatalk
-
Not sure who that is. Does he have picks?Rudy has used them at Golden Basket, so they do work and work well
Sent from my iPhone using Tapatalk
Sent from my SM-A205U using Tapatalk
-
I read a couple of similar reviews. But I guess everything has been worked out with the app after a series of updates. So hopefully no issues, but other than that they seem to be great lights and very positive reviews.I bought a set a few years back, and couldn’t get them to work with my home WiFi for some reason. They worked from my office, but not my house. Customer support wasn’t able to get it figured out, so had to return them.
Sent from my iPhone using Tapatalk
Sent from my SM-A205U using Tapatalk
-
Like 4 pics of your tank showed up at the end of my build thread for some reason. Lol. Just thought it was oddIntroduced them to my display today, they seem to be really happy! [emoji4]


Sent from my SM-A205U using Tapatalk
-
For some reason pictures of your tank showed up on a thread of mine. Was really weird.Introduced them to my display today, they seem to be really happy! [emoji4]
Sent from my SM-A205U using Tapatalk
-
I have a 2 in diameter rbta that I need to trade. Switch tanks a week ago and ever since adding it to the new tank it hasn't looked happy. I'm also open to cash. In Chehalis Washington

Sent from my SM-A205U using Tapatalk
-
Out of 100's of reviews and a 4.5 rating, and a price of $375 each, I couldn't pass it up so I ordered two. 120 watts, 40 cree leds, 5 customizable channels, and wifi.
Anyone have them that would like to give some input?

Sent from my SM-A205U using Tapatalk
-
2
-
-
Here's a picI like it! Yes I was able to tune it to be silent by making my overflow tube half the height of my emergency tube and using a gate valve to control the flow. Dead silent!
Sent from my SM-A205U using Tapatalk
Sent from my SM-A205U using Tapatalk
-
1
-
-
Thanks! What I have is hardly what I would call a wood shop. Lol. I have an unfinished garage with tools scattered around. [emoji226]Nice work! Looks great. I miss having a woodshop...
Sent from my SM-A205U using Tapatalk
-
 1
1
-
-
I like it! Yes I was able to tune it to be silent by making my overflow tube half the height of my emergency tube and using a gate valve to control the flow. Dead silent!Looks great! Nice job on the stand!
how do you like the eclipse overflow? I have a buddy who’s tank needs one and wondering what your overall impressions are? Did you get it tuned to be silent?
Sent from my SM-A205U using Tapatalk
-
ALL DONE! Hope you enjoyed all the pictures! If you have any questions about the build, let me know!


-
7
-
-
I told myself a little over a year ago, when I upgraded from my 30g Hexagon to my 40g Breeder, that I wasn't going to upgrade again for at lest 5 years. Well, Facebook Marketplace is a real SOB! I saw this new Marineland 60 Gallon tall tank on there and my mind started clicking. I kicked him an offer, picked it up, and explained to the wife later. lol. Anyway, aside from the Marineland Tank, everything is DIY.
Got the tank home. This sump is actually a custom sump I made 11 years ago for my first ever tank. Excited to use it again.

Got my Eclipse M and Drilled my first hole ever! Little nerve wrecking, but not bad at all.


Needed a stand big enough to handle the tank, sump, and plumbing all in one. I used 3/4" Pine plywood, and solid pine for the face and framing. Turned out great.

Wanted the back blacked out so I grabbed a can of flat black and started spraying!

Dry fitting everything and running plumbing.
.thumb.jpg.d7b5ada83c1430ef9b484e7834de68e2.jpg)
Switched everything over to the new tank. It was getting late so my main goal was to just get everything in the water for the night and worry about the rest of the mess in the morning. had to find a way to use my light rack for my 40g breeder.

Started to build the cupboards. Mad shaker style with the tools that I had. Using a Kreg jig and pocket screws. Used a router for my inside panels.

Got the doors painted and installed! Next is the new lighting rack...

For the lighting rack I used 3/4" and 1" aluminum with self tapping screws.

Next post will be the rest!
-
3
-
-
How much for 2?
Sent from my SM-A205U using Tapatalk -
That light rack is sweet! When can we see the uno's?
Sent from my SM-A205U using Tapatalk
-
This sucks. I was going to come down there and buy a harlequin shrimp from you! Good luck in the future.
Sent from my SM-A205U using Tapatalk -
They come in yet?I am told I will get a 4-6 next week if that helps
Sent from my SM-A205U using Tapatalk
-
Sweet. Where are you located?I am told I will get a 4-6 next week if that helps
Sent from my SM-A205U using Tapatalk
-
I need a Harlequin Shrimp. I live in Chehalis, WA, but I'm willing to drive anywhere between Tacoma and Portland to get it. Let me know where and how much $. Thanks
Sent from my SM-A205U using Tapatalk


.jpg.cf31aeef3d7d3551bff9e135673c65ec.jpg)


40 breeder w/sump and light rack
in Classified Threads
Posted
I'm selling my old setup. It comes with a freshly painted stand, black back glass, and drilled for an Eshopps Eclipse M overflow. 10 gallon sump, and light rack. $150 obo in Napavine,WA. 70 MILES NORTH OF PORTLAND


Sent from my SM-A205U using Tapatalk