

NateDawg
-
Posts
274 -
Joined
-
Last visited
-
Days Won
4
Content Type
Profiles
Forums
Events
Store
Posts posted by NateDawg
-
-
Welp, it's all yours whenever you wanna get it, just shoot me a message and I'll get it cut n bagged.
-
I dont have a huge sump but I can trim you some dragons breath and chaeto as long as you dont mind a little hair algae and a good amount of varios copepods. I'm in South Albany.
-
Dang, this would be great as I'm about to graduate with with two different electronics degrees.... I wish they had an office further up north from california.
-
 1
1
-
-
You could try going into the settings at the top right of the energy bar icon and refreshing or looking for a setting to delete that specific energy bar from fusion.
-
That unfortunately sounds like a faulty energy bar. A short from a piece of equipment wont really cause an error in voltage but rather a larger wattage due to more amps being used. I would be surprised that it would be a firmware issue since it looks like your other energy bars are working fine. If you have a voltage meter, you could check the wall outlet rms voltage that the bar is plugged into and make sure your getting between 110 to 120 volts. Another thing you could try is plugging in each piece of equipment directly into an outlet that works and see if each piece of equipment works fine. If all of the equipment works fine. Then it sounds like the energy bar is busted.
-
Hopefully, you can figure the issue out soon. And hopefully non of your devices are shorting out.
-
I would first unplug everything from the energy bar and check to see if the error still shows up on fusion, if not then plug in each device one at a time to see if one of the devices is faulty. Since you got a notification about the skimmer first, I'd leave that unplugged and have it be the last thing you plug in and try.
-
Are able you able to see this voltage on apex fusion? If so. What does it say?

-
Might want to post this in the classifieds thread. Might be why your not getting any inquiries.
-
1
-
-
8 minutes ago, R-3 said:
Thats awesome Nate! Very impressive work
Thank you!
-
11 minutes ago, SuncrestReef said:
Wow! Another reason I think I may need to get a 3D printer at some point. Nice work!
Thanks!, I don't think I could go back to not having one, it does take some practice but it can sure pay off sometimes. Now I just have to wait and see if its sealed enough to be usable in an aquarium environment.
-
1
-
-
I then coated the magnets with a light bit of oil and glued the two shells on it with some Cyanoacrylate glue and let the harden.

Once they were cured, I added a little more glue to all the seems and then sanded down the impeller shaft till it was smooth(ish).

Then put everything back together tested the pump, and it works! I have the impeller sitting in saltwater for a couple weeks to see if it sealed properly. But if it did, I ended up saving about $50-$60 for a new impeller!

-
4
-
-
I then made a 3d model using tinkercad that matched the dimensions of the impeller before the plastic shell was taken off.

printed the model.

and made sure that the pieces fit.

-
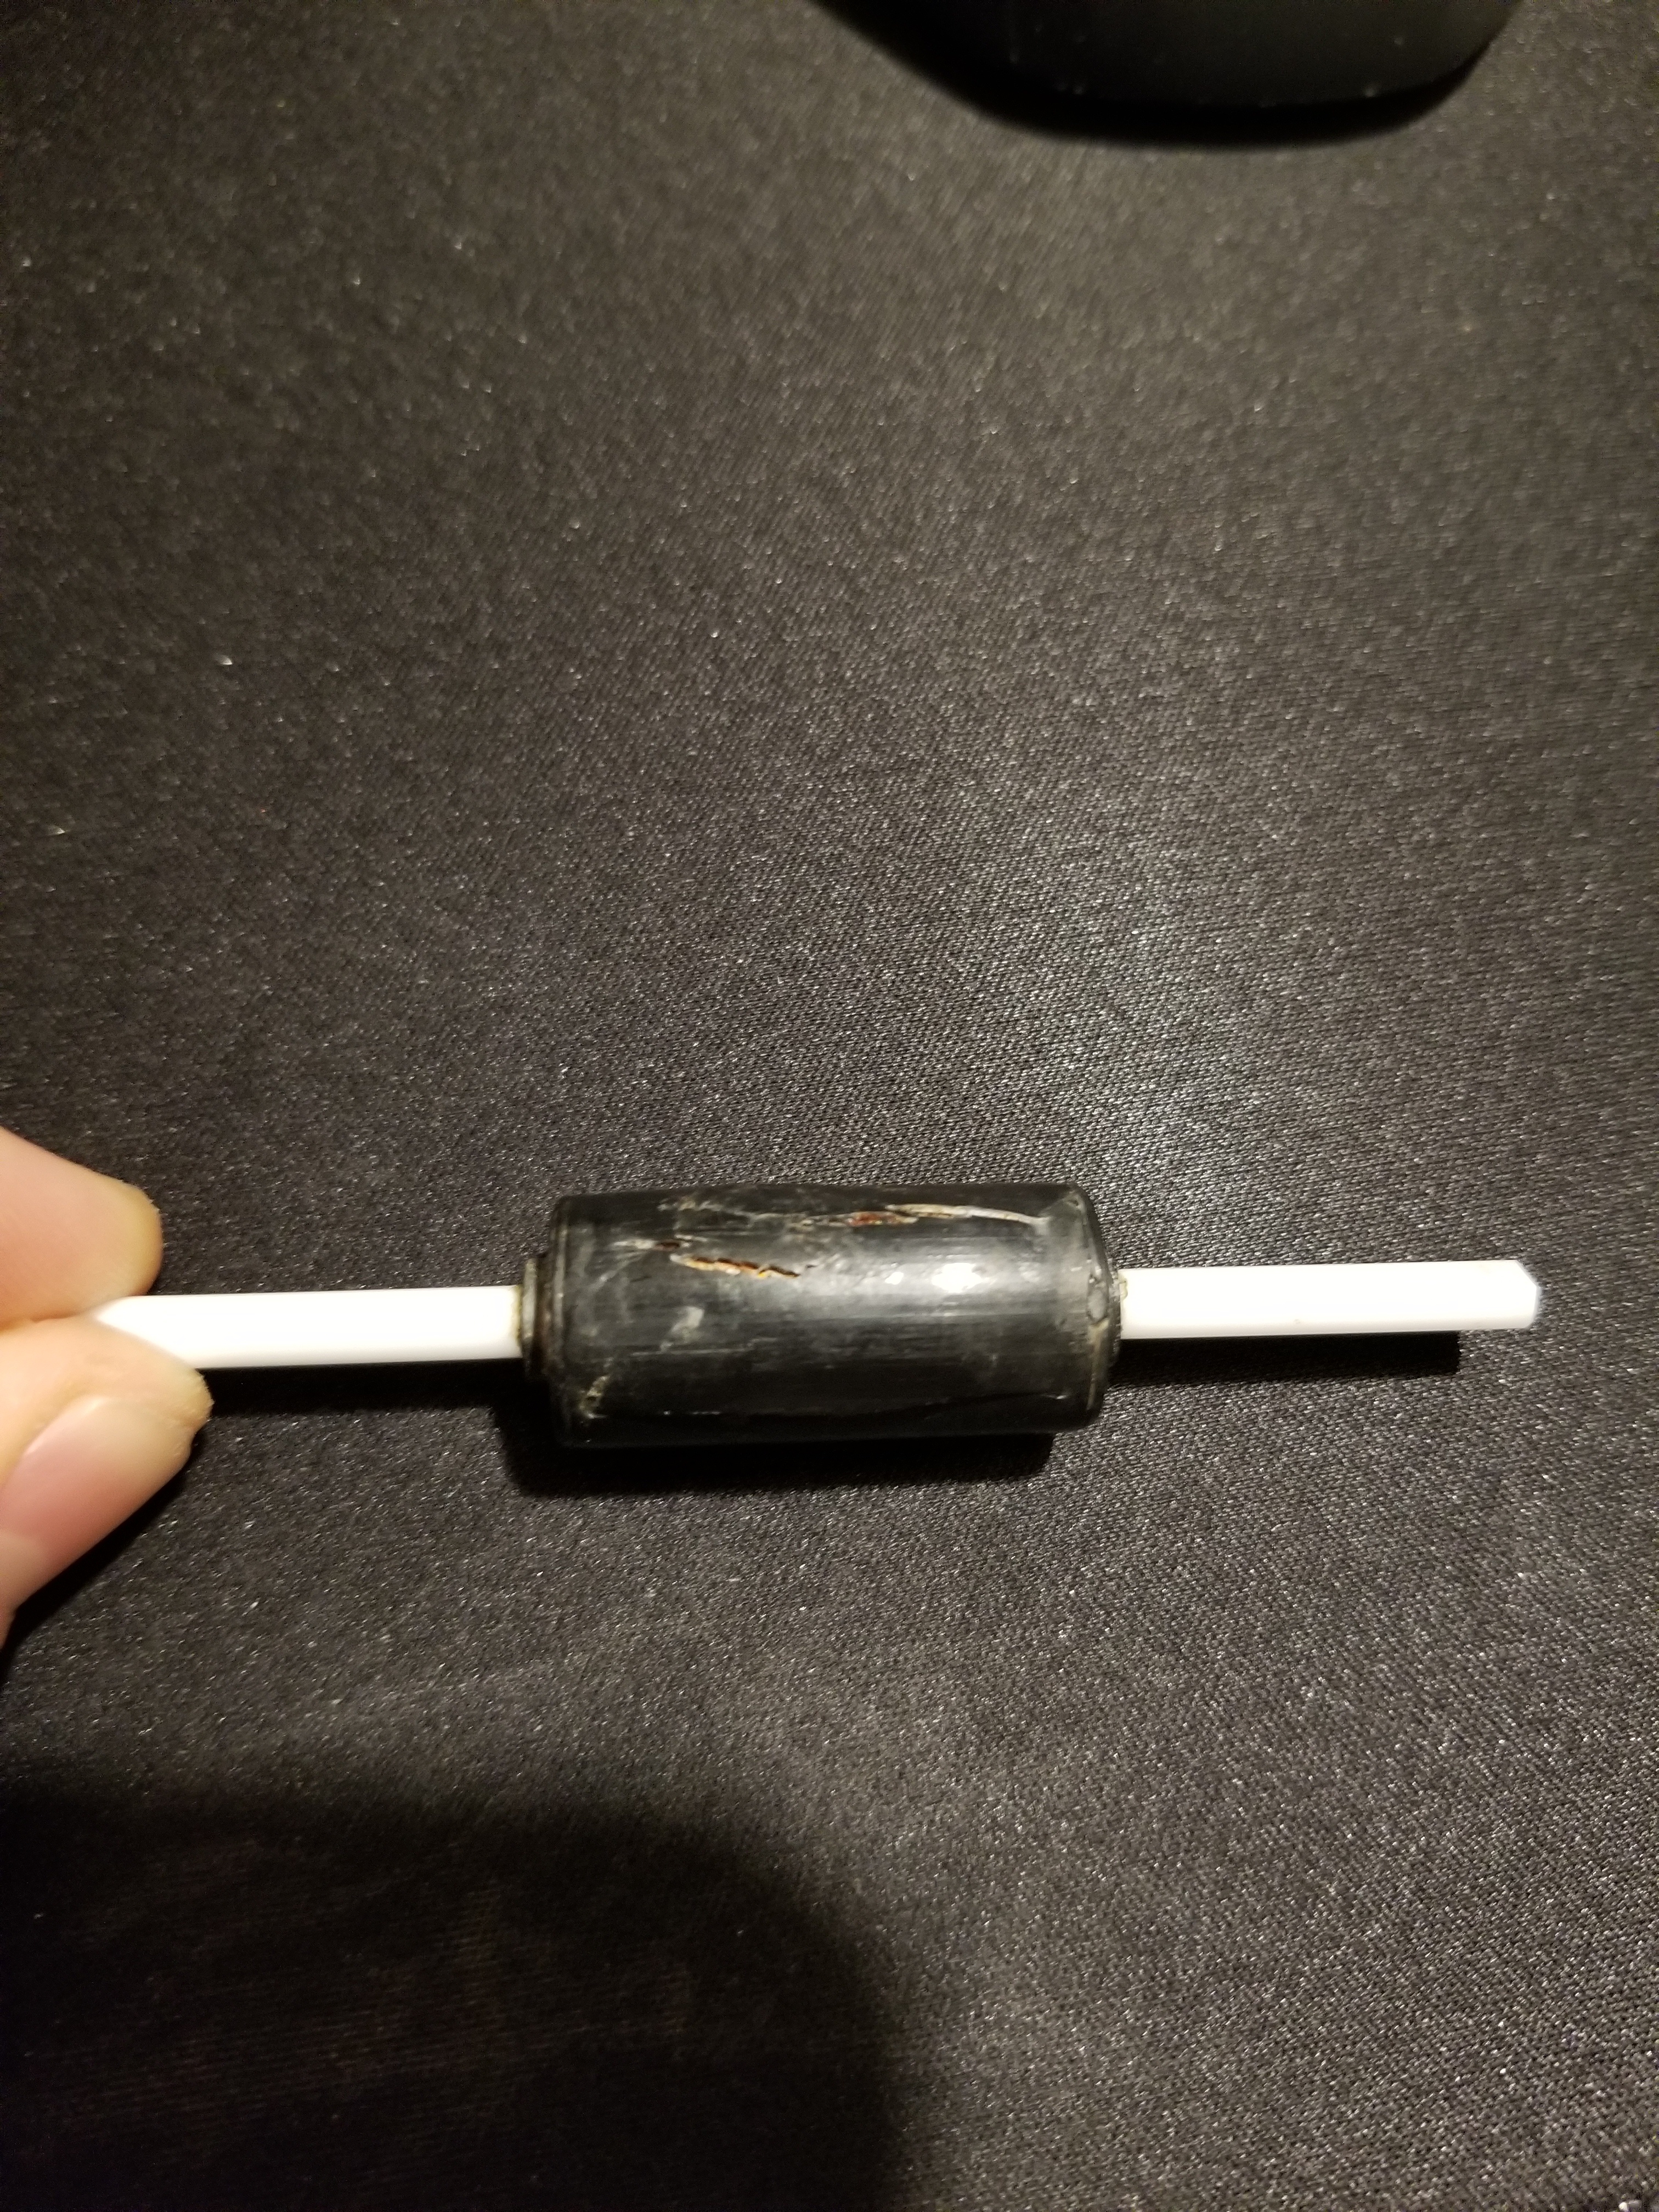
The first thing I'd like to put in here is how I repaired a maxspect gyre magnet shaft.
This shaft had its magnet swelled up and cracked from using vinegar to clean it.

I first took off the protective plastic shell and scraped off all of the rust and sanded the corroded magnet down to it's original size of about 13mm in diameter.

Then I cleaned and measured all of the magnet shaft diameters so I could build a 3d print of a new shell.

-
I'm not sure if there is already a thread like this but I wanted to put together some builds and repairs I've done using a 3d printer and share the 3d models with others as well as a place for others to share their ideas with one another.
-
-
Here is a good example of what vinegar will do to a maxspect gyre shaft. I bought his pump about 5ish months ago used, cleaned it with vinegar, washed and rinsed, then put the pump in storage for a future build. Pulled it out today and had to basically hammer the impeller out because neodymium magnet that was encased swelled up.

-
 1
1
-
-
5 hours ago, SuncrestReef said:
It's due to the memory capacity on the Apex, and it will also shorten the historic data you will be able to view.
Makes sense, thanks for the info.
-
1 hour ago, SuncrestReef said:
@obrien.david.j Another thing to remember when overlaying graphs is that the pH data is being sampled by default every 10 minutes for graphing, but the output logging happens in real time. The actual programming decisions are based on current pH readings, but the graphs are only 10 minute intervals. So while it may look like your pH is too low and the output should not turn on, the graph is just showing an average between two sample times. You can change the sample rate, but it's not recommended to make it too frequent.

Excellent work as usual! Just curious, why is it not advised to increase the frequency of data logging?
-
Share the pods!
-
13 minutes ago, Trailermann said:
Nate said: .... and I usually use a small spray bottle of baking soda water and that has done me pretty well if I need to have the frag glue faster.
I tried baking soda powder and it was a disaster. Never thought of a simple solution spray.
Yup, I'm not sure of the concentration though, I'd start out very little on the baking soda part to water, then add little little by little to make sure it doesn't burn the coral tissue, but if it's just applied to the glue before attaching the coral to it, should be fine and there's not even a need to rinse the frag since the baking soda can only add to the alkalinity of the tank which is usually a good thing.
-
If anybody is interested in the chemical makeup of the insta set, here is a link to the msds for this stuff. https://www.google.com/url?sa=t&source=web&rct=j&url=http://www.bsi-inc.com/sds_pdf/sds_insta_set.pdf&ved=2ahUKEwjKjdrJq-7mAhXXvZ4KHf64CtgQFjAAegQIBRAB&usg=AOvVaw12znQ7wYVqYykgWBAXPf6K
The two ingredients in it are:
1. Naphtha (Petroleum) Hydrotreated Heavy
2. N,N Dimethyl-P-Toluidine
Might want to be a bit careful while using this stuff. Just looking at some safety data sheets for the second ingredient, they state that it's highly toxic to both humans and aquatic life.
I know superglue will cure faster in alkali conditions and I usually use a small spray bottle of baking soda water and that has done me pretty well if I need to have the frag glue faster. I'm not sure if it's as effective as the insta-set from brs though. Only costs pennies to make though which is nice.
-
1
-
-
If you end up going with the two sumps, it's easy to just cut a good sized hole in both sumps on either side where you want them connected then stand one sump on its end, add a few drops of acrylic weld-on to the one side and set the other sump on top of it allowing gravity to push the sumps together. Make sure the weld-on completely filled the gaps between the two sumps and when it cures, those two sumps will be stronger than if they were one unit to begin with. And no chance of them leaking if it was bonded correctly.
-
1
-
-
I'm not sure about the red sea stand hinges but if they are bare metal like mine were, I took some rustoleum spray paint and gave the hinges a good couple coats on all the parts of the hinge then took some bearing grease and coated everything that rubbed or moved in the hinge with a thick layer of the stuff. I've had those hinges for 6 years and they don't have a bit of rust on them except for the one little scratch I made on one of them.
-
2
-


Old Gyre Parts FREE
in General Discussion
Posted
PM sent.