milesmiles902
-
Posts
1,718 -
Joined
-
Last visited
-
Days Won
14
Content Type
Profiles
Forums
Events
Store
Everything posted by milesmiles902
-
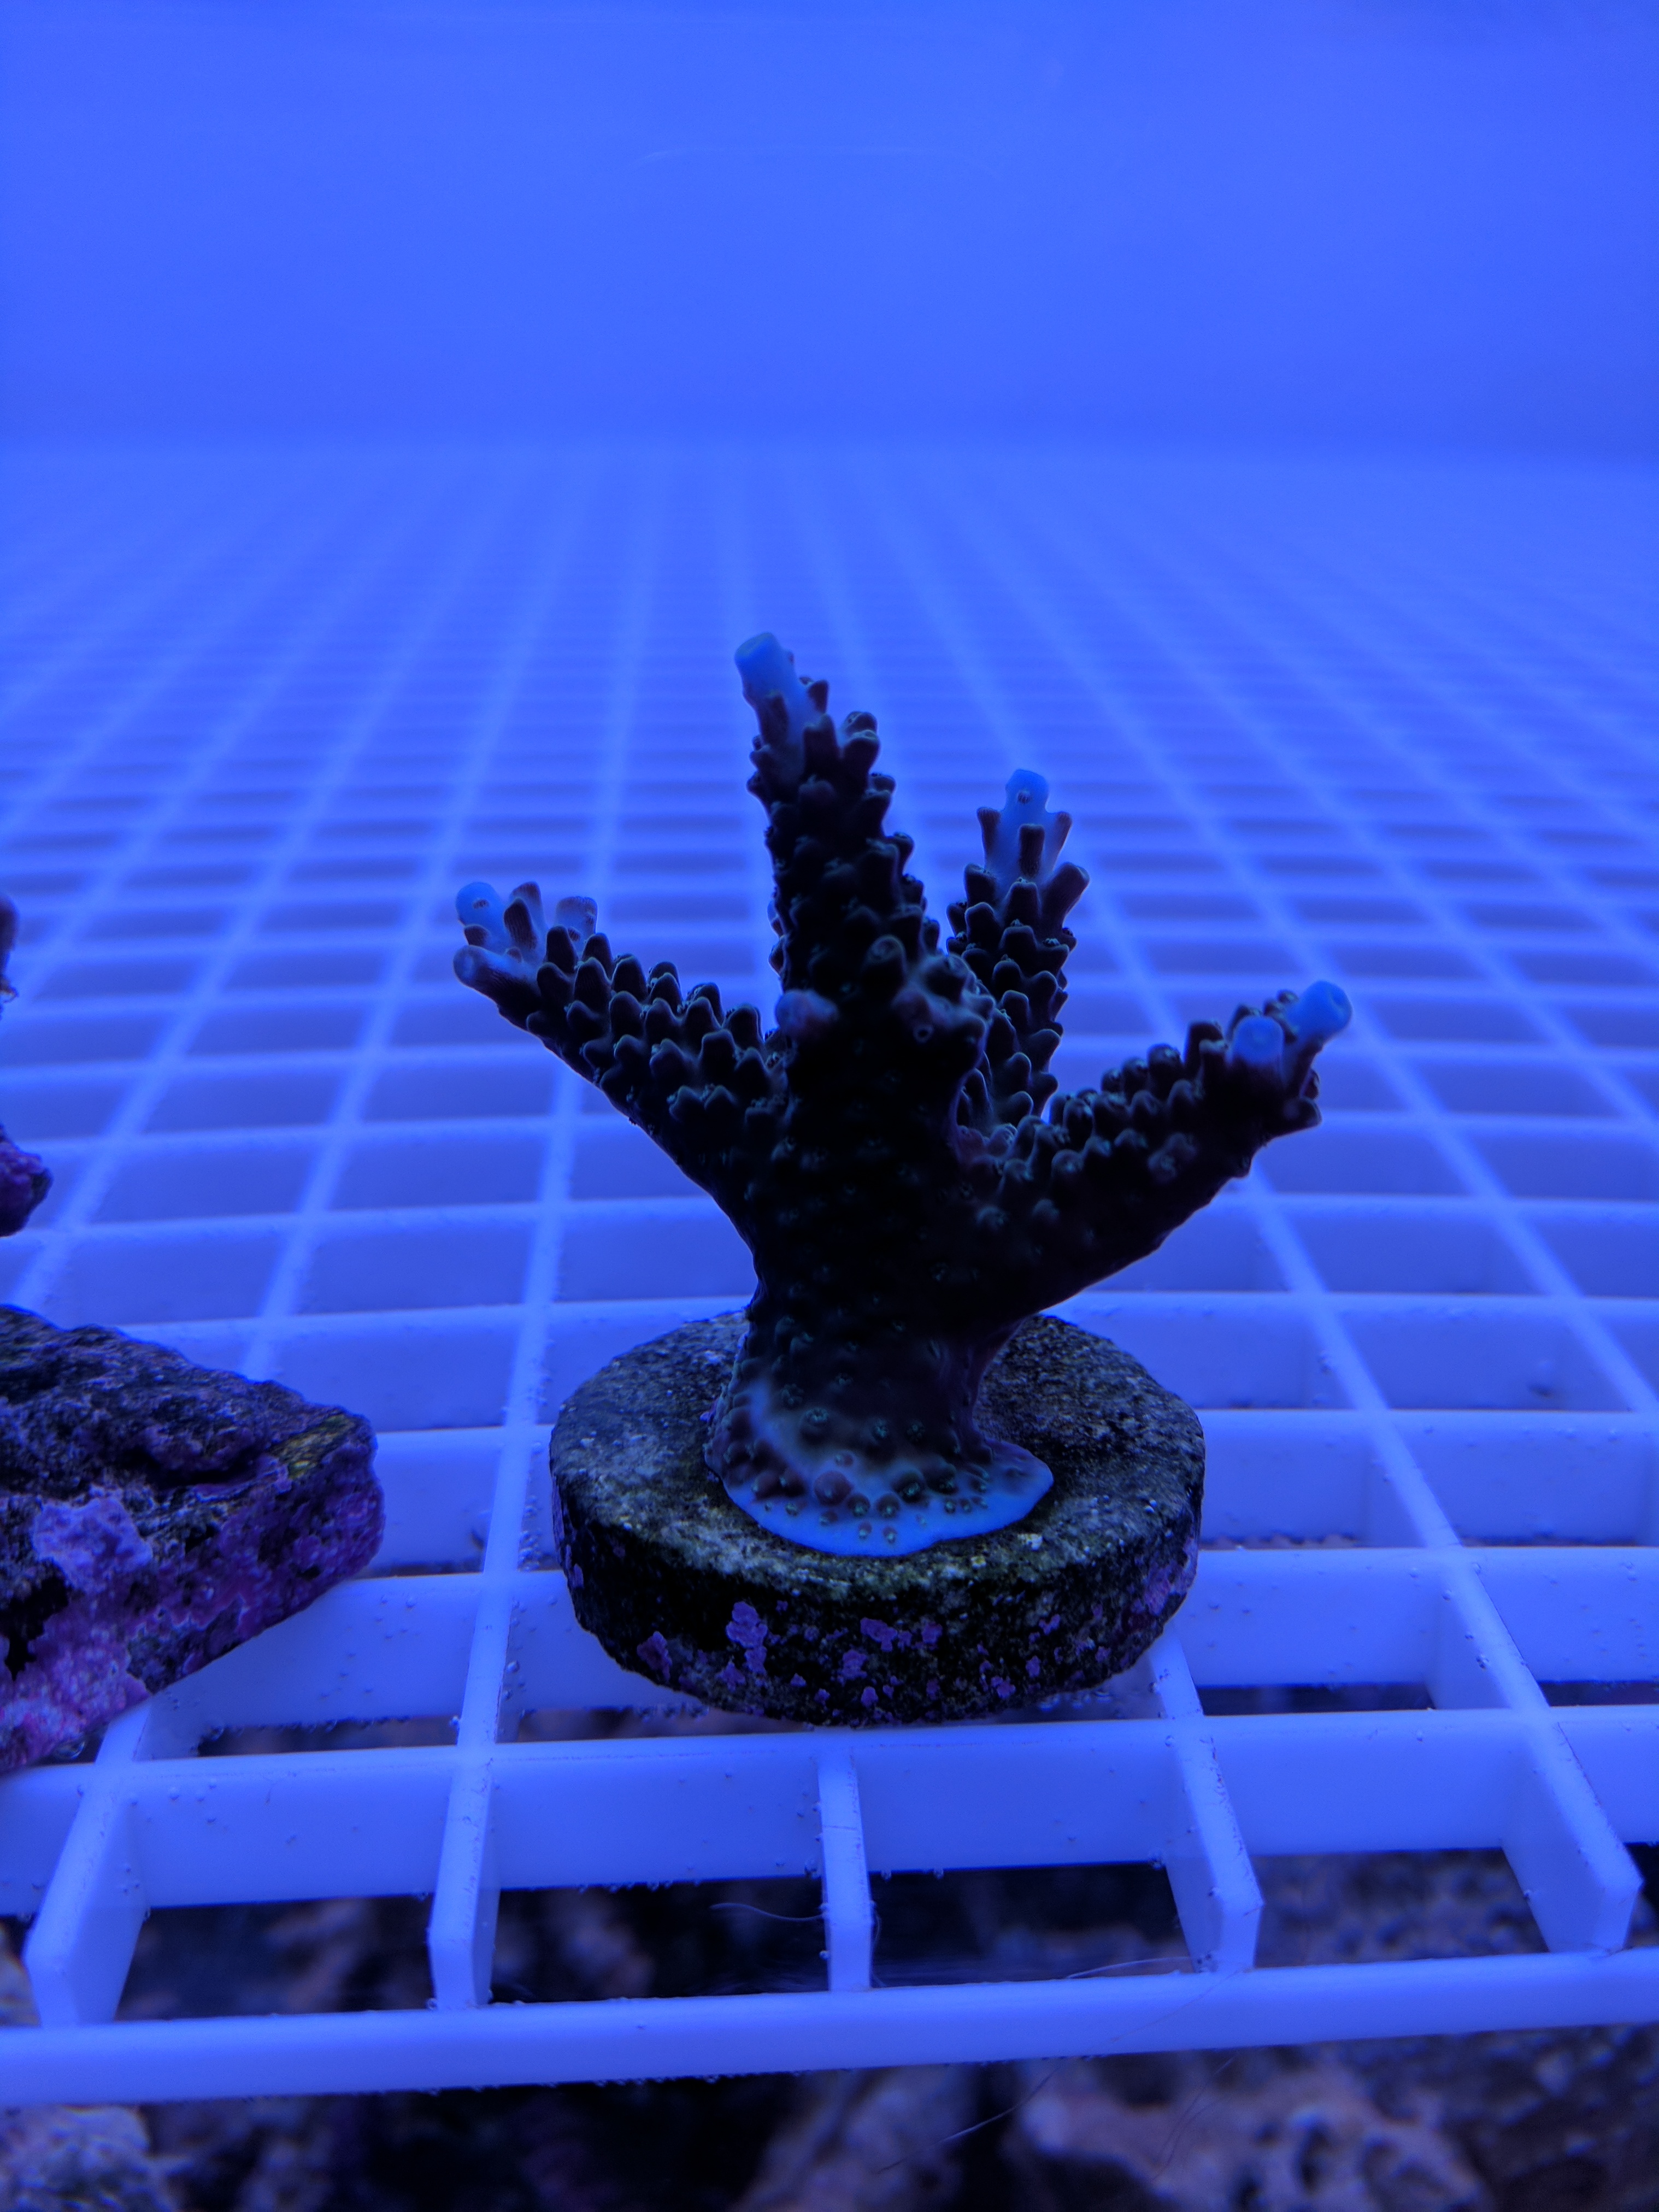
March - Xoanthids: Nanoreefer

-
Hello everyone! I'd like to announce March's 2017 Picture of the Month winner: NanoReefer Congratulations!
-
Unless you want the protein skimmer in the main tank, you have to drill an overflow or use one of these: http://aquarium.bulkreefsupply.com/search?w=external overflow&asug= Otherwise, just figure out what you want to put in the tank and build it around that.
-

Building an over-complicated system - 60 gallon lagoon
milesmiles902 replied to milesmiles902's topic in Tank Threads
I am sorry to hear that you had a similar situation. I bet you can clean the Tek light. I found out what mine was...the heaters. Once I added a clip to keep the head out of the water, nothing tripped. Glad I am enough of a pack rat to be able to find them. -
Building an over-complicated system - 60 gallon lagoon
milesmiles902 replied to milesmiles902's topic in Tank Threads
Well, I have to say you need to make sure you get yourself a GFCI outlet. Remember, safety first. I just got home and plugged in a new GFCI outlet and it tripped. Crazy people don't have them. Don't be a crazy person! TheClark probably saved my life. +1 -
Images Broken Today - For A Good Cause
milesmiles902 replied to TheClark's topic in General Discussion
TheClark and Chief, thank you. I can now transfer all of my personal photos to the PNWMAS server as added backup. You can never be too careful. -
Building an over-complicated system - 60 gallon lagoon
milesmiles902 replied to milesmiles902's topic in Tank Threads
Alrighty. I'll grab one this week. It is a cheap life-saver. Literally. My breaker box is exactly right behind my aquarium outlet. Maybe it won't be too hard. Did you get an electrician to do your arc fault receptor? -
Building an over-complicated system - 60 gallon lagoon
milesmiles902 replied to milesmiles902's topic in Tank Threads
It sure is a trap. Even when I was at Home Depot, I had many moments when I paused and had to think if I really needed what was in my hand. It's too easy. -
Building an over-complicated system - 60 gallon lagoon
milesmiles902 replied to milesmiles902's topic in Tank Threads
I have a couple older return pumps around, but I don't think they compete with the 1100 GPH I currently have. I looked into GFCI outlets, but in the past I thought you had to rewire the breaker box. It has always been difficult to do such a thing in a rental home, but after looking around, maybe you can avoid the rewiring. Did you install your own GFCI and arc interrupter? -
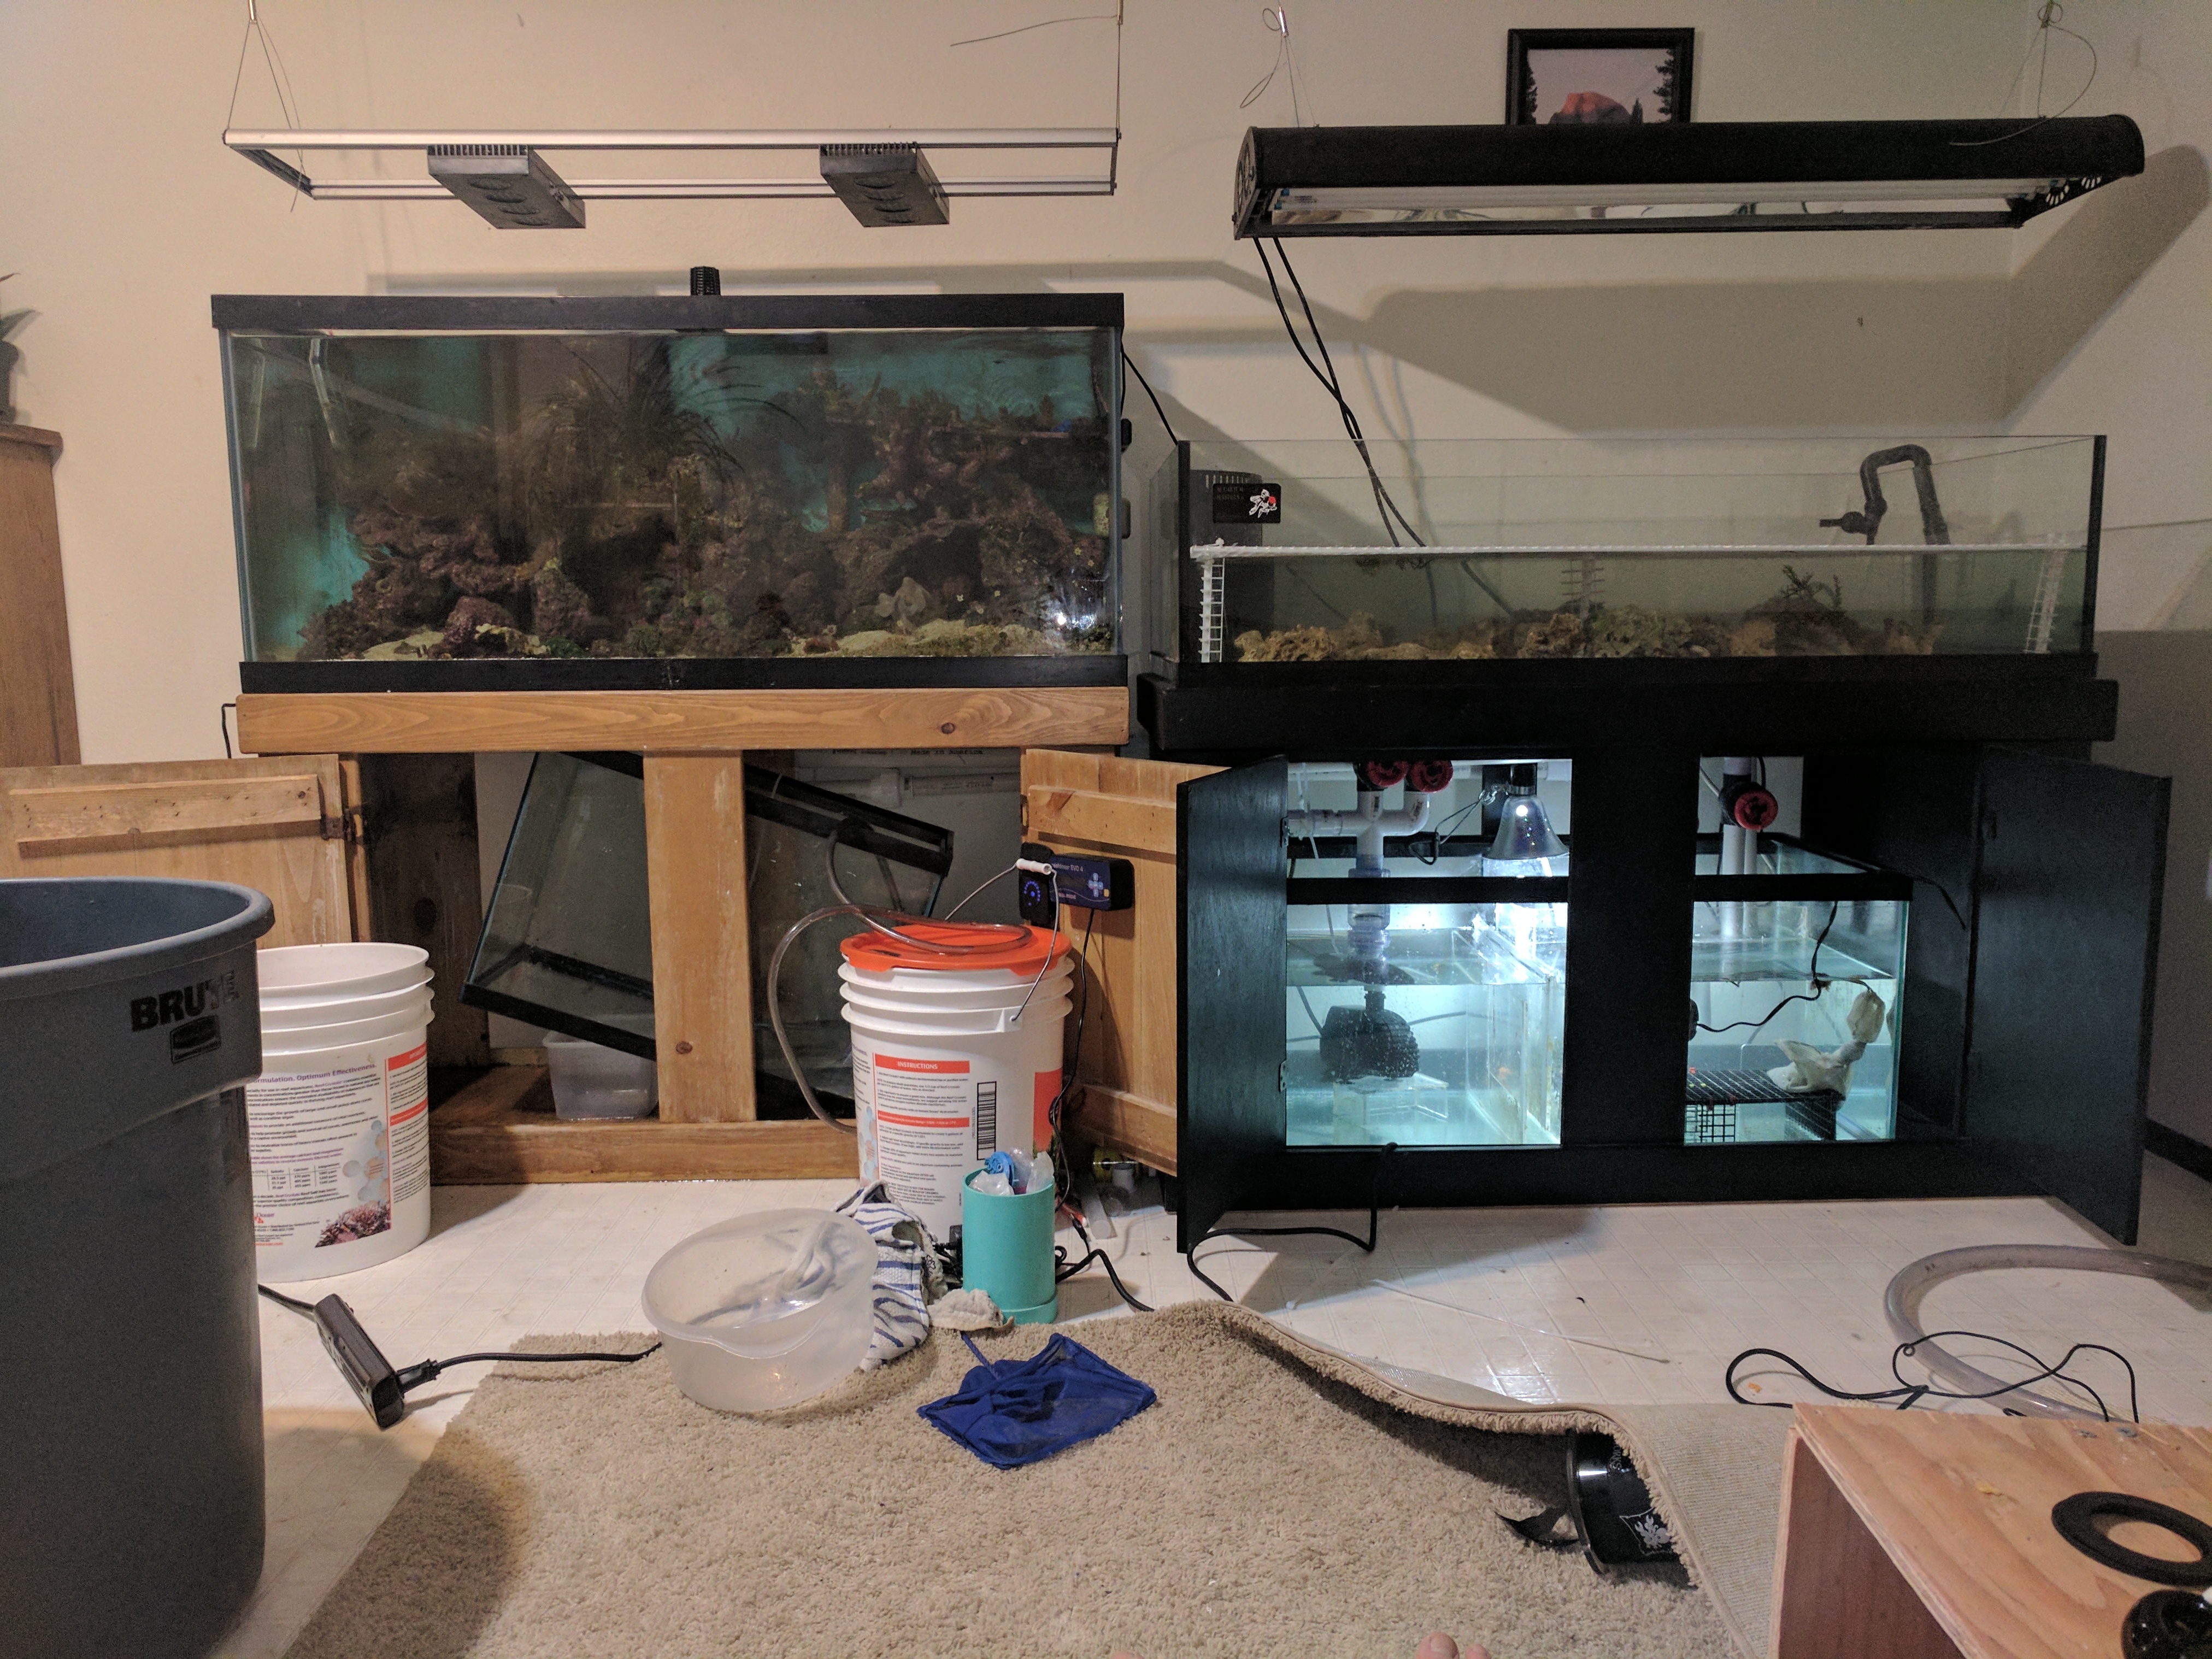
First off, I would like to start off by thanking PowderBlue, WingRider62 and Garrett from TPA. I wouldn't have been able to do this without you guys. Today I finally finished setting up my 60 gallon lagoon and connecting it to my main display. ...but where did this all start? About a month ago, I came across WingRider62's 6 bulb T5 fixture on the forum and decided the deal was too sweet that I had to grab it. On the way north, I stopped by TPA and they had this tank sitting in the back of the store. I knew it would fit the light, so I grabbed it too. I got back home and unloaded them, but they sat in my garage for a couple weeks because I didn't have a stand. I saw Powderblue selling his stand and sump, but couldn't pick it up during the week because of work and finals. with the sump below the aquarium: Right after my finals finished, I left the testing room and began drawing my plumbing plans....on the back of my final. I knew I couldn't get the old sump out from below the 75, so I decided to re-implement it as an auto top-off reservoir as shown below. I went and ordered all the pieces online and began to wait. After failing and wasting too many materials in my life, I finally...FINALLY realized what separates the men from the boys and it's measuring. So, I went and re-drew everything to scale on multiple pieces of cardboard. This: ...became this: The refugium was going to be below the tank and I didn't want it to shine through at night, so when some PVC was drying, I added some aquarium backdrop to the bottom of the aquarium. Outside of the aquarium is blue and inside is black. I had to size everything up, so two nights ago, the living room looked like this (if you look closely there is actually a toothbrush on the ground). I was sizing up a lot of the larger pieces before I glued them. I knew even with measuring, nothing was going to fit snugly. Zip ties were key. Before I had everything on the lagoon completely glued, I went and painted some of the PVC black because I didn't want the white to distract. Once all the plumbing was done for the lagoon, I had to begin plumbing the display. I screwed up when I originally designed the overflow and had to cut it to implement to new plumbing. Here is what it looked like: Once I cut the display overflow, the clock was ticking. It no longer had a sump and a lot of the equipment had to be temporarily moved around. Eventually, I sized everything up, but the worse part was I realized I didn't have enough water to supply my new tank and sump, so there was a lot of waiting. People! Make extra water! Anyhow...I had a lot of time to clean out my old sump while I waited. Here is what it looks like now. It is going to be used as an auto top-off reservoir. I was also getting sick of remaking my two part calcium and alkalinity solutions every couple months, so I upgraded to 5 gallon containers. Everything eventually came online. Being in a rental home, it would be the end of me if all the water spilled, but I fearfully went to bed. I had known that there is always minor leaks, so I threw some towels down around the tanks. When I woke up this morning, I sprinted over to my aquarium to find everything ALIVE! A couple towels were wet, but nothing I couldn't clean up. Here is what it looked like after I transferred some of the coral. Now for the part that was the most complicated. The main sump. P.S. Zip ties are still attached for safety reasons. Let me dissect this monstrosity. On the left, we have the return pump, going to a a 1 inch true union check valve and then a four-way junction. On the four-way is a 1" return to the main display, 3/4" return to the frag tank (with gate valves) and currently a screw-on cap. Eventually, I plan to route this junction straight through the wall behind the tanks and into the garage. It would give me the opportunity to have water change reservoirs out of sight from the public and have easy access for disposal. It's not happening anytime soon, but I hope that in the future I will never have to lift another bucket. On the right, is the drains (and emergency) from the tanks, skimmer, heaters and refugium. I was so pissed off that I glued that gate valve at an angle, but if that's the worse of my problems. Who cares. Although, that refugium light did fall into my tank early this morning and I immediately pulled on the cord to get it out. The light never went off, nor did the power bar or breaker, so I unplugged it and let it dry. Once dry, I plugged the bulb in, but couldn't remember if I left it on or off...it started making a slight buzzing noise, so I assumed it was on. I tried turning it "off" but that was really on and the thing exploded. No light bulb in sight, half the fixture was gone and this time the breaker blew. Luckily, I had an extra lying around. People, before you build a tank, do these things: 1. Keep the power off, until everything is in place. I learned that the hard way. 2. Make enough water before you start. Count on leaks and count on overshooting your guesstimate. It never hurts to make extra. 3. I had to cut a couple bulk heads because they were either damaged, too small, or had silt in them. Be careful with them because you often don't have any to spare. 4. PVC is made to fit only a certain size. Build it at the store, bring it home with a couple pieces in excess. When it is 3 am and you need a 1" to 3/4" adapter because something is leaking...ya, just buy extras and return them as needed. Home depot is cool like that. All in all, this is what the tanks looked like late tonight. They are operational, with a few minor things to come. You'll just have to wait and see.


-
That's impressive. Is the frag tank connected to the main display?
-
I bet it would work. The spot that I always dump my old saltwater has nothing growing. Although, I am not sure if it is from prolonged exposure.
-
Please bare with me for a second. We have a new image upload system and my html references to our image server might not be correct. Edit: POTM will close on 4/04/2017 at 12:00 am. Let the voting begin!
-
March Picture of the Month - Zoanthids
milesmiles902 replied to milesmiles902's topic in Show Off / POTM
Just a heads up, this will be closing tomorrow the 31st at 12 pm and voting will begin. Please get your pictures in! -
That;s a sweet tank. The small skimmer really makes it. Glad to see you back in the hobby. It's hard to quit.
-
Can I get on the list?
-
That tank looks killer! And you did a great job with that stand. I honestly say keep the ATI. It's the perfect size and it will grow corals like crazy.
-
What size?
-
Just lost a ton of montiporas and chalices...
milesmiles902 replied to LadAShark's topic in General Discussion
Also, I think if you come across any corals you want to keep. It wouldn't hurt to throw in some activated carbon. It sounds like the the water has been sitting stagnant for a while. I was curious, what were you storing your corals in? There are some things you can do to mediate them for quite a while. From a glance, I wasn't sure if they still were at their house, in buckets or what? -
It's still pending. :(
-
directly uploading photos to website
milesmiles902 replied to pdxmonkeyboy's topic in Suggestion Box
Pictures!
-
Will I be able to create a refugium in this 2 chamber sump
milesmiles902 replied to ninkylou's topic in Equipment
To be honest with you, I think that first chamber would be an excellent spot to put a regium. The water flow from the overflow will help add some movement to the macro algae. Copepods will come with a refugium, unless there is something to eat them. -
`You did a great job on that tank. Was it your first try?
-
Garrett! Happy Birthday!!!!!! I am glad we met. You are such a good guy. Edit: Keep on looking young.
-
You are right. Controllers are a bit expensive, but you are paying for the assurance that nothing will go wrong with the device. You have prompt support if you ever need it and a multitude of reef-ready devices. In general, that's how most things are in the reefing world. You could design your own with a raspberry pi and there are plenty of DIY tutorials out there to do it.